Add a New Model
Read Below First
To be able to add a model to a document, the document must first be prepared by a consultant in the BIMA Construction application. After that a contractor with the role Document Control (DC) in the BIMA Projects application can add a model to the document that has been created by the consultant in BIMA Construction.
Add a New Model
1. Input the Code
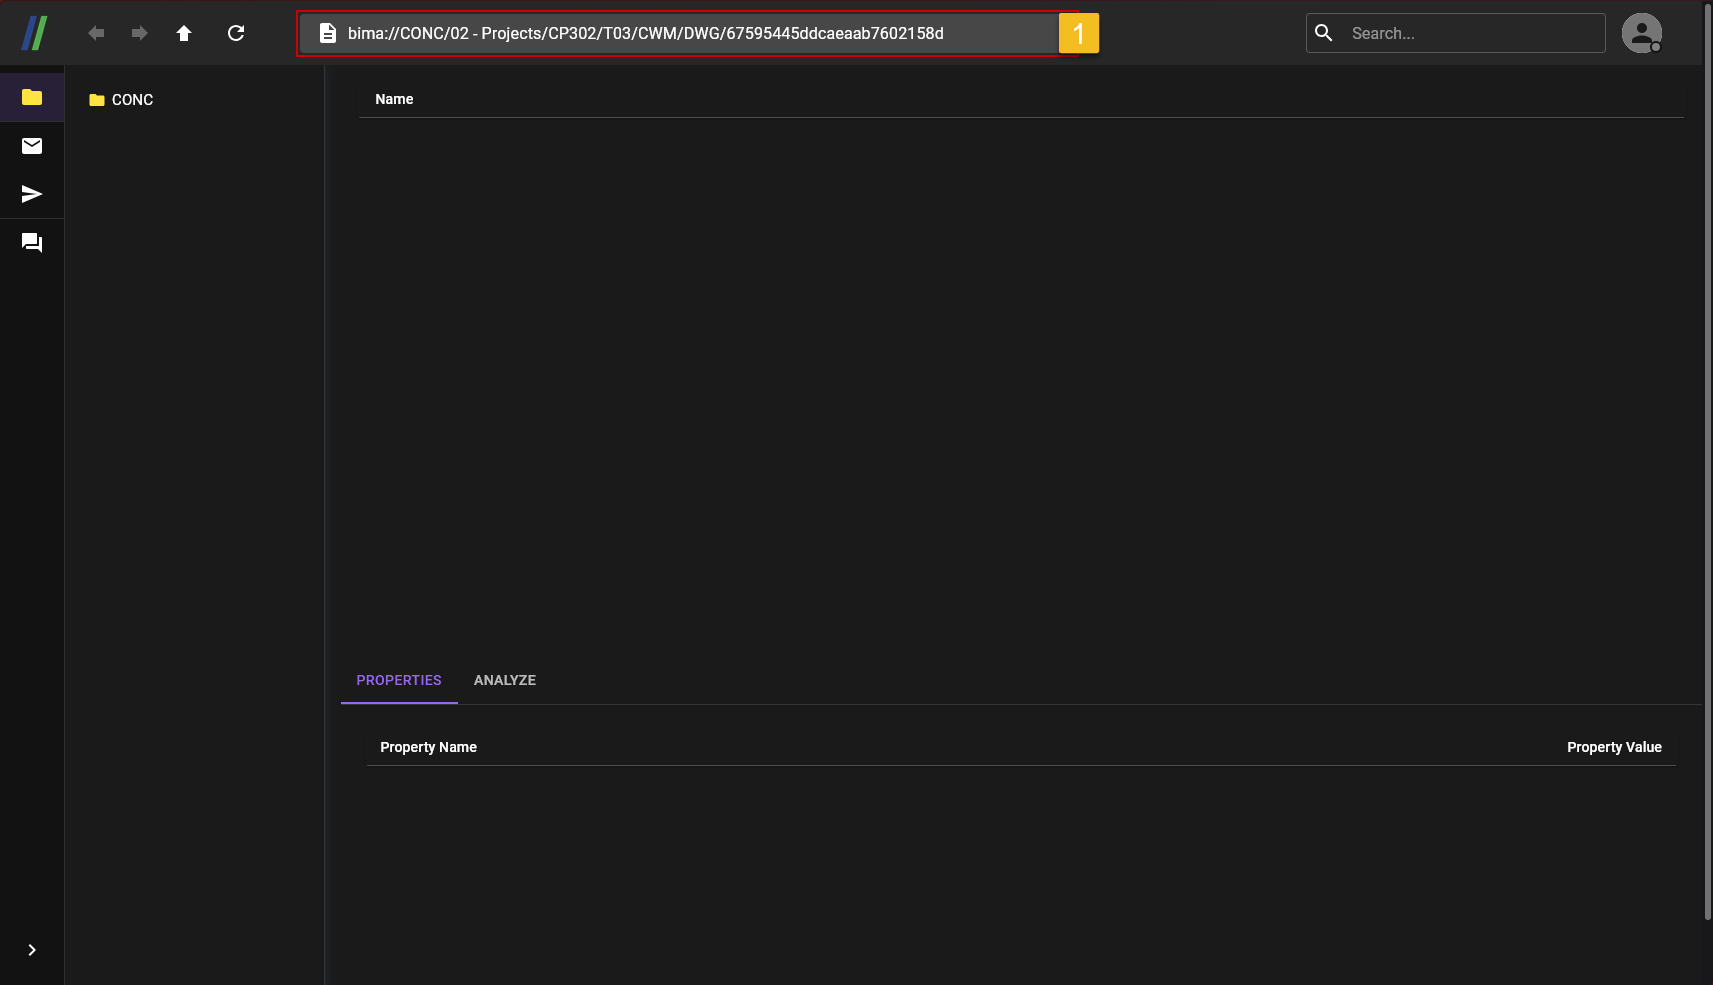 After loggin in to an account that has the role
 Document Control (DC). The USER will be on the main menu of BIMA Projects application, the code from the document that the USER gets through the BIMA Constrcution consultant can be inputted in the area marked with a red box.
2. Open the Document
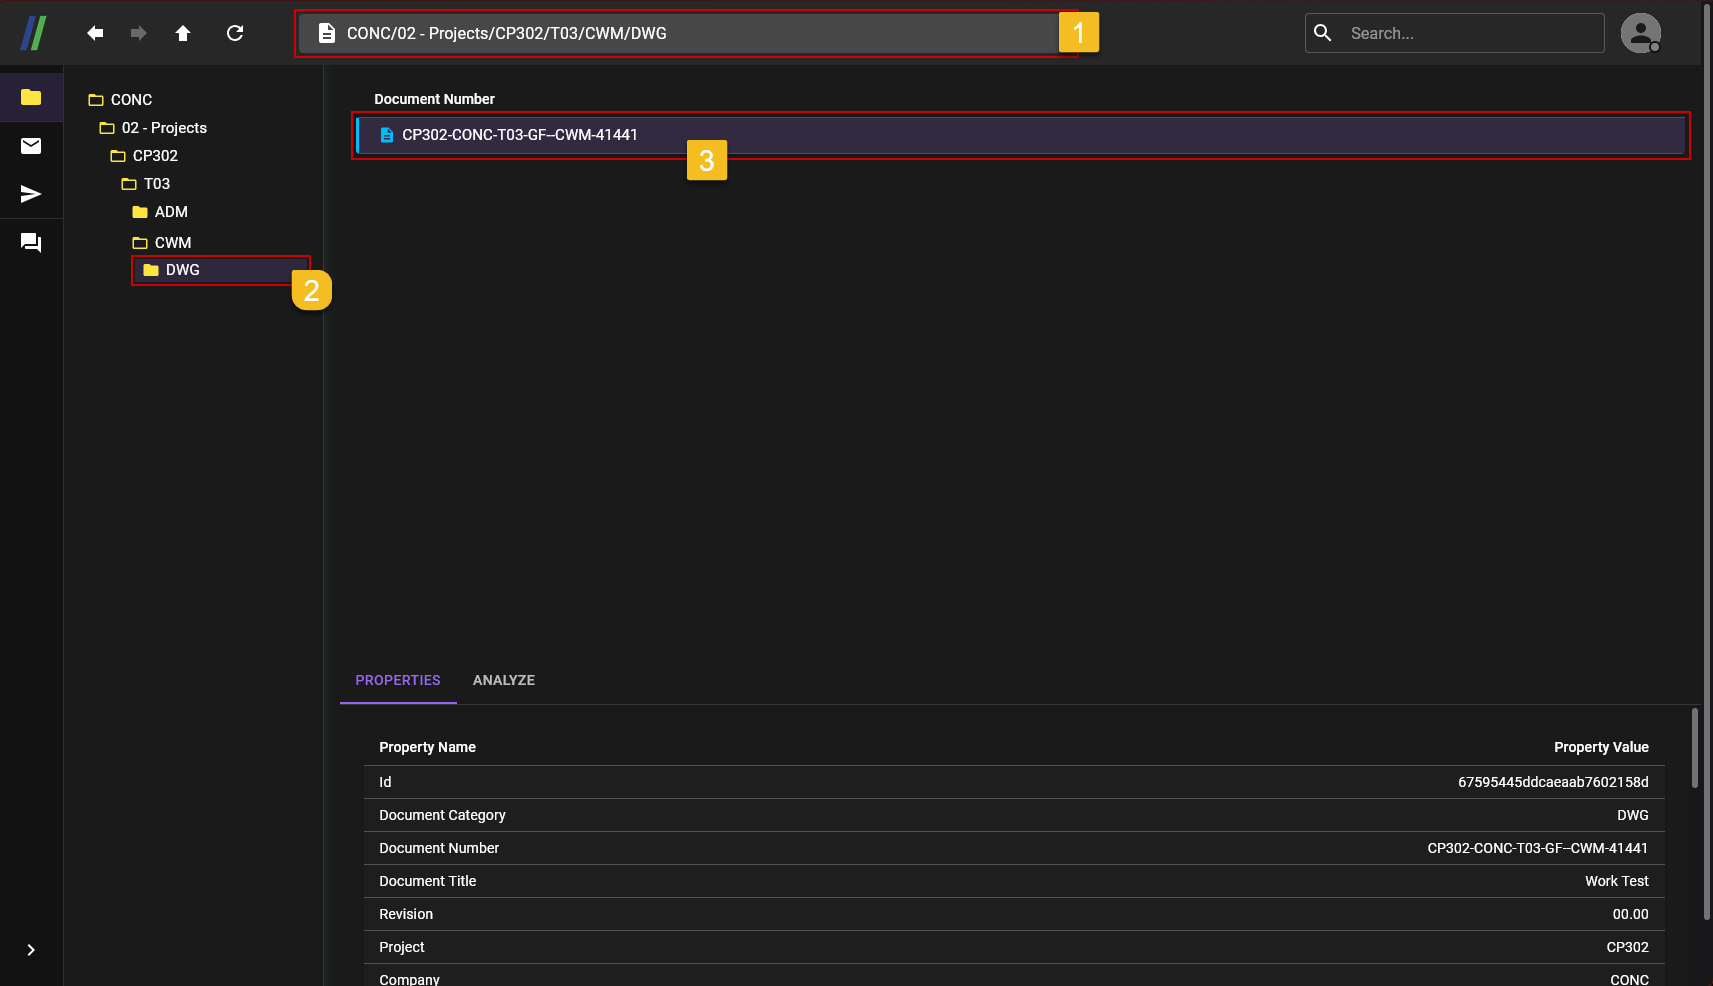
- After the code sumbitted, BIMA Projects will iimmediately direct the USER to the document where the model will be added.
- The USER can
Left-Clicktwice on the areaNumber 2. - The USER can again
Left-Clicktwice on the areaNumber 3(the document), to see the content/add file/model to the document.
3. Add File

- After USER are inside the document, the USER can click inside the area of the red colored border (
Nunmber 1) to open the action menu to add the file/model. - After the action menu shown, USER can click on the
Add Filebutton. Select File(s)button will shown, the USER can click on the button to start selecting files that needed to be added.
4. Choose File to Add as a Model

- Select the file that the USER wants to add.
- Make sure the file that choosen are correct.
- After making sure the file choosen are correct, the USER can click on the
Openbutton, to upload the file.
5. Adding File Model
 After done choosing all the files/models the USER wants to add, the USER can click on the
 Upload Files: [number of files] button, to finishing the adding process.
Caution
Please do this step first before continue to the next step, because this part is a crucial step so the file be able to load on BIMA3D.
1. Set File/Model as Main IFC
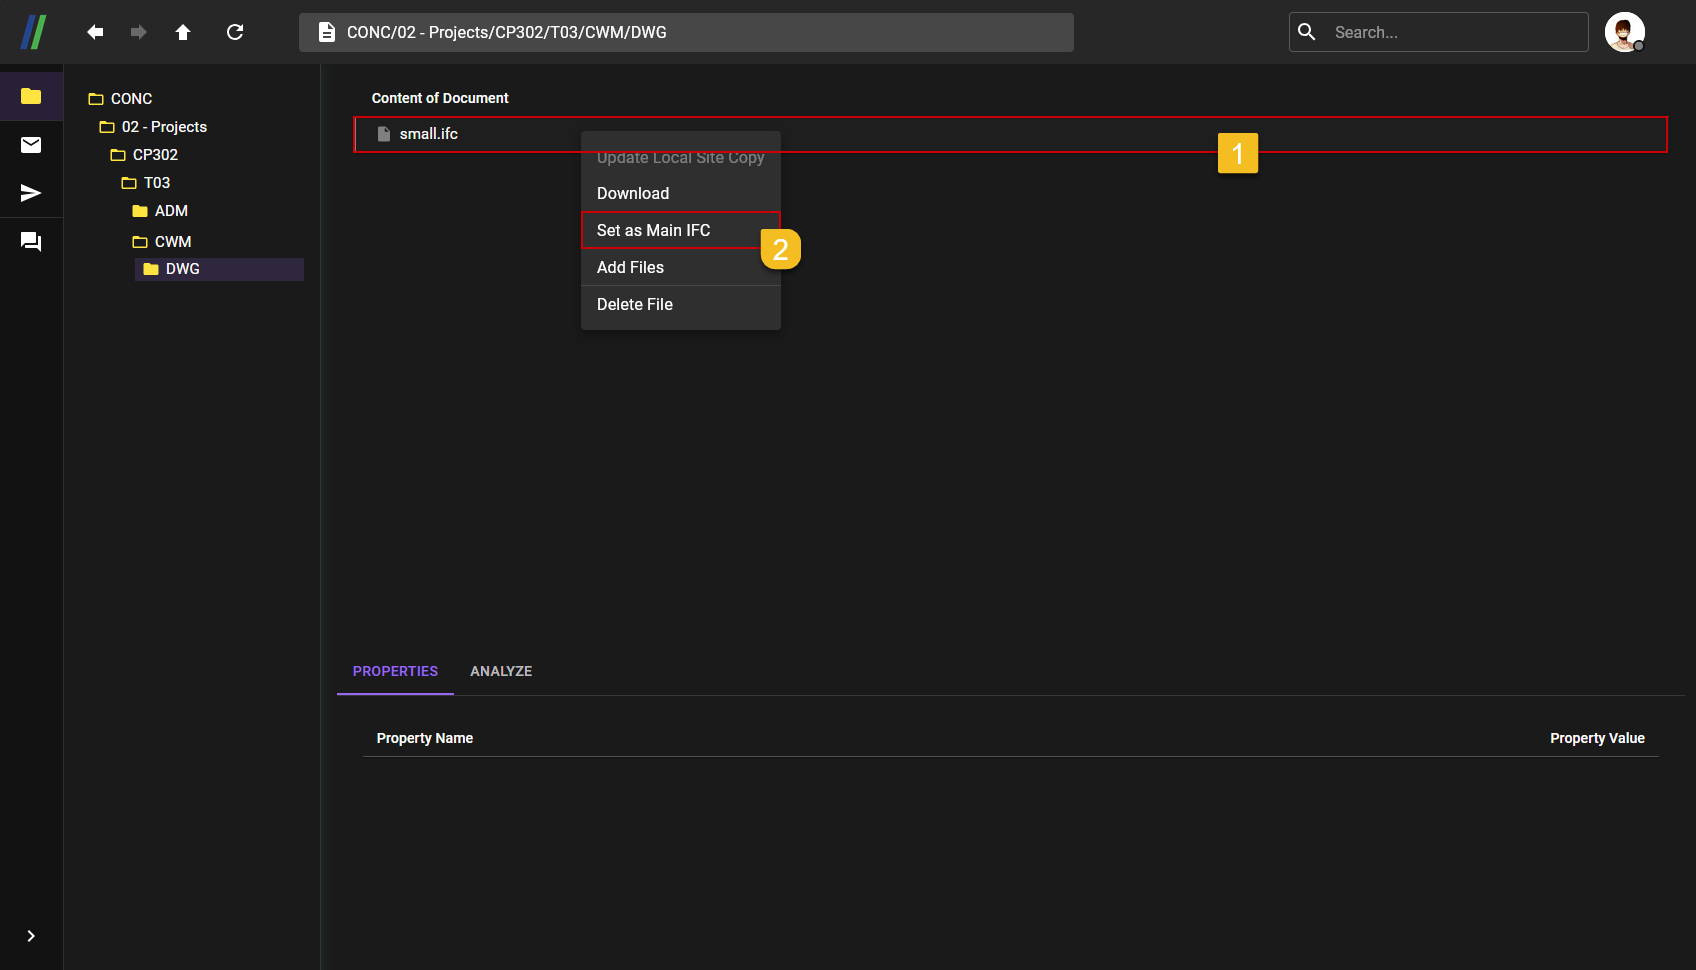
- USER
Right-Clickon the file that need to be set asMain IFC. - The USER then can click on the
Set as Main IFCbutton, to set the fie as the Main IFC.
2. File Set as Main IFC
 Done the file are set to the Main IFC.
3. Remove File/Model as Main IFC (If User Want To Change Another IFC)
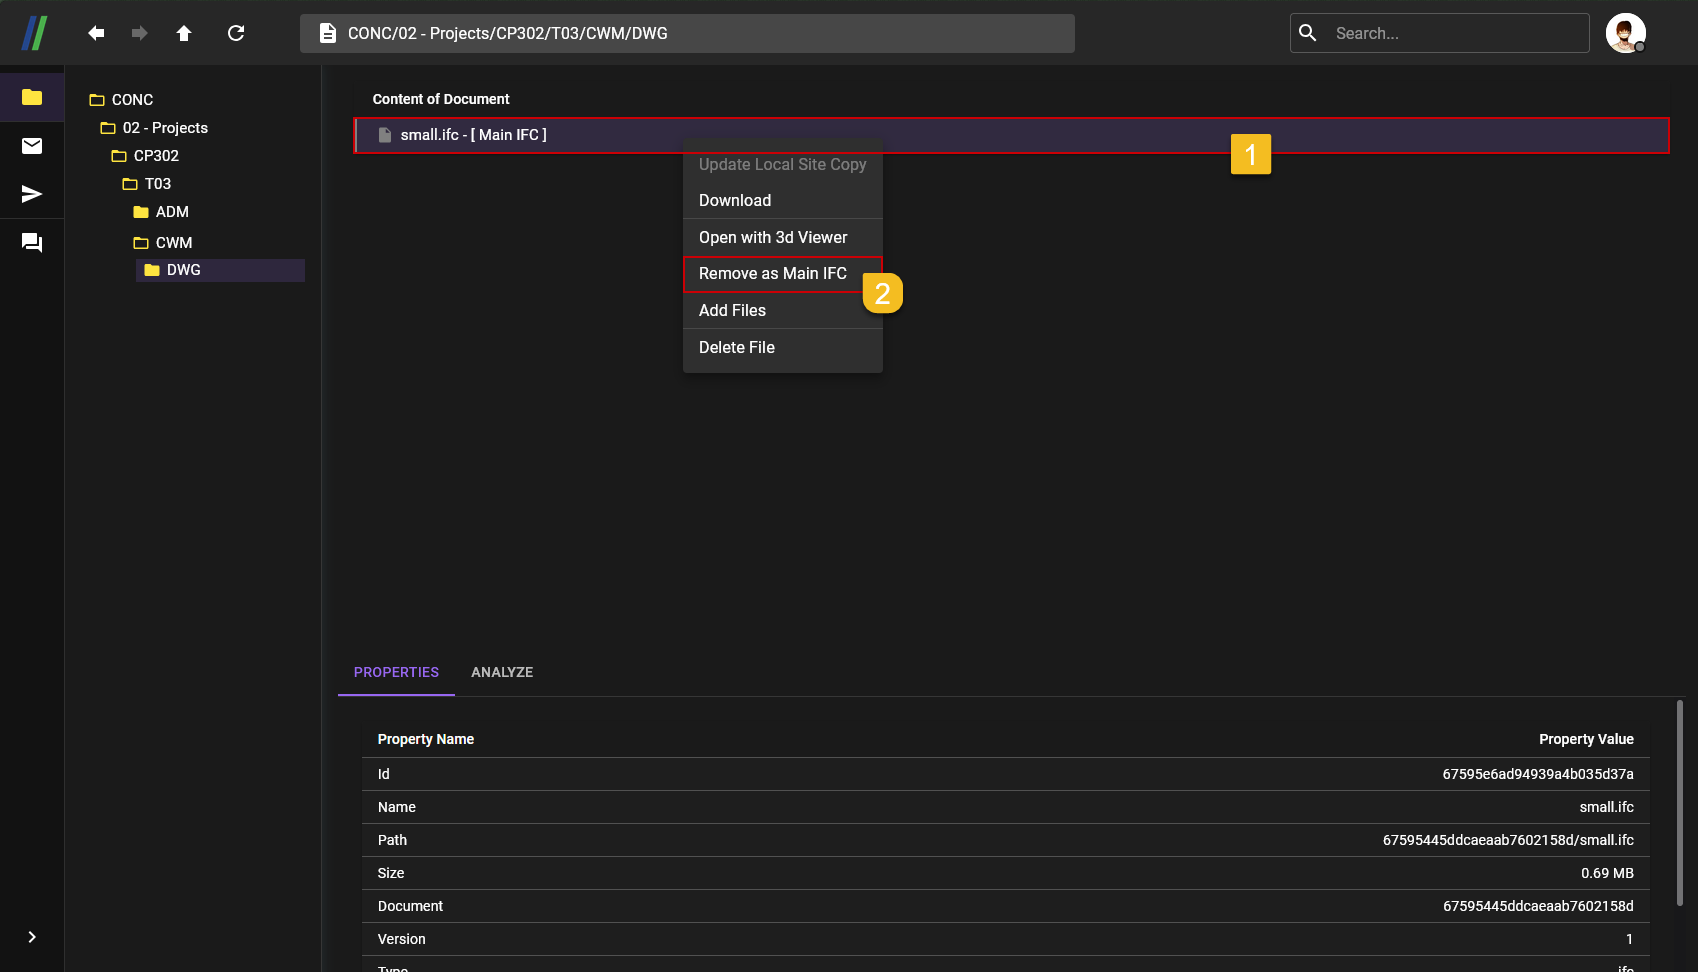 The USER can change the Main IFC into another file/model, if the USER wants to change it the prosess are,
- Select the Main IFC file, and
Right-Clickon it. - The USER then can simply click on the
Remove as Main IFCto remove it's status as Main IFC, and pick another file to be the Main IFC by following the Set File/Model as Main IFC process over again.