Create Project
1. Go to Project Page
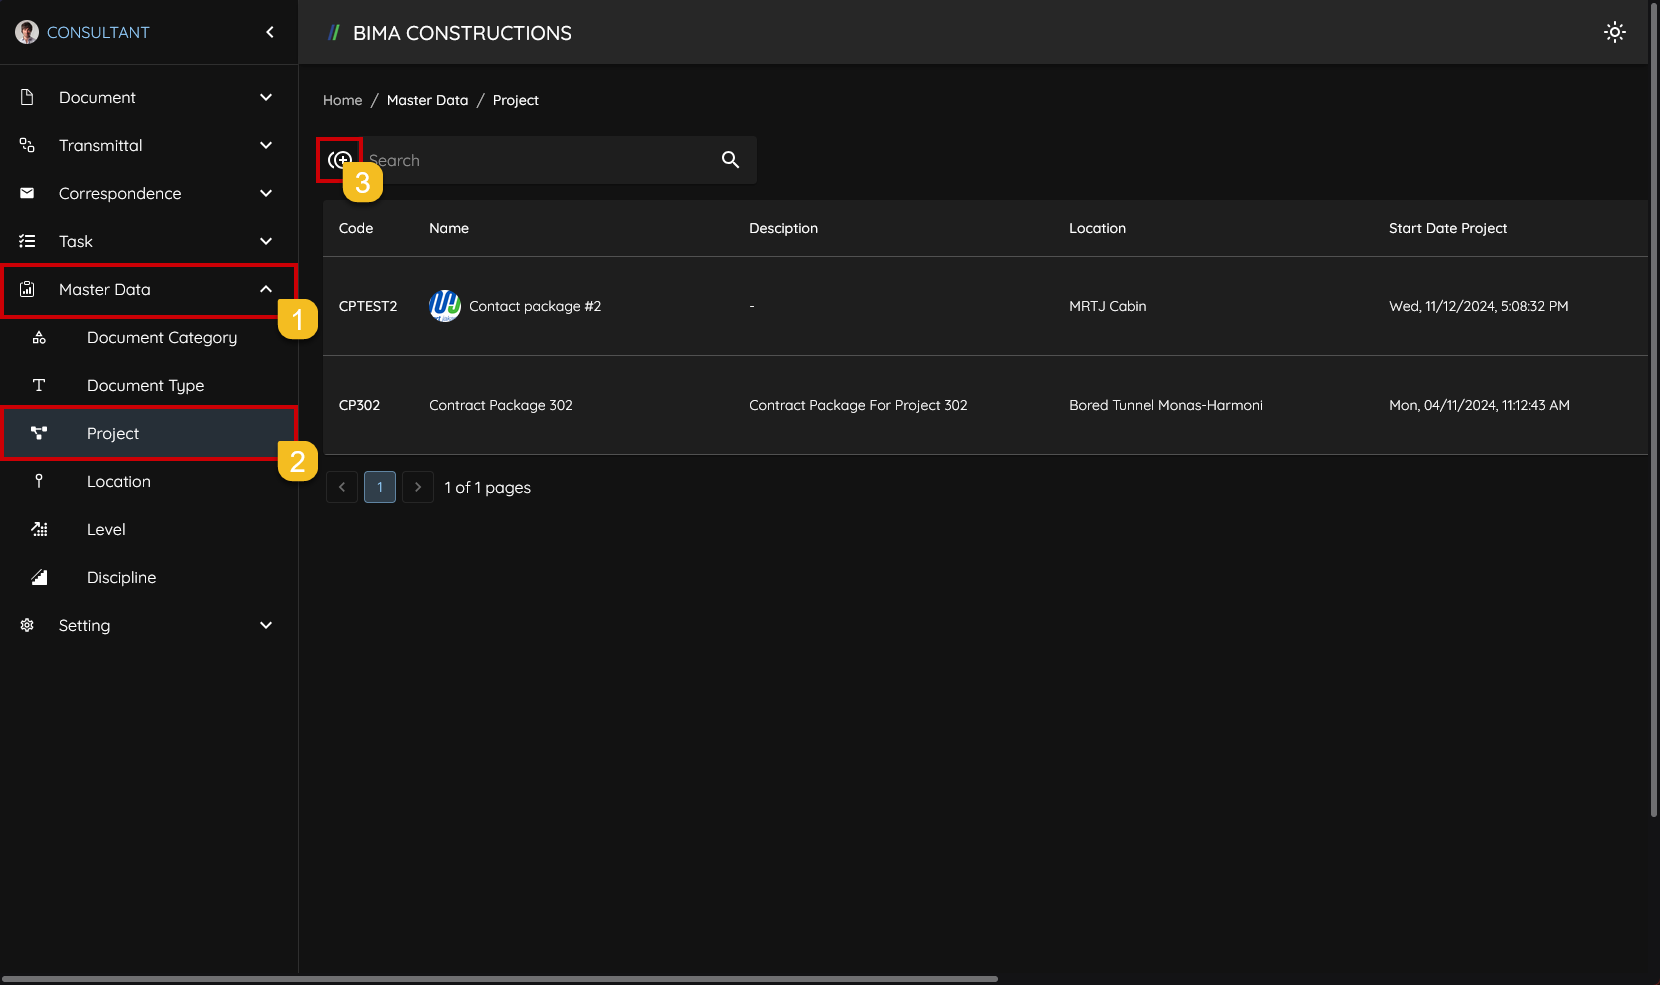
- Owner can click on the
Master Datamenu to open the dropdown list of menu insideMaster Data. - Owner then can click on the
Projectmenu to go to theProjectpage. - After opening the
Projectpage, Owner can click on the+button located on the upper left of the page, to open up theCreate Projectpanel.
2. Add/Create a New Project
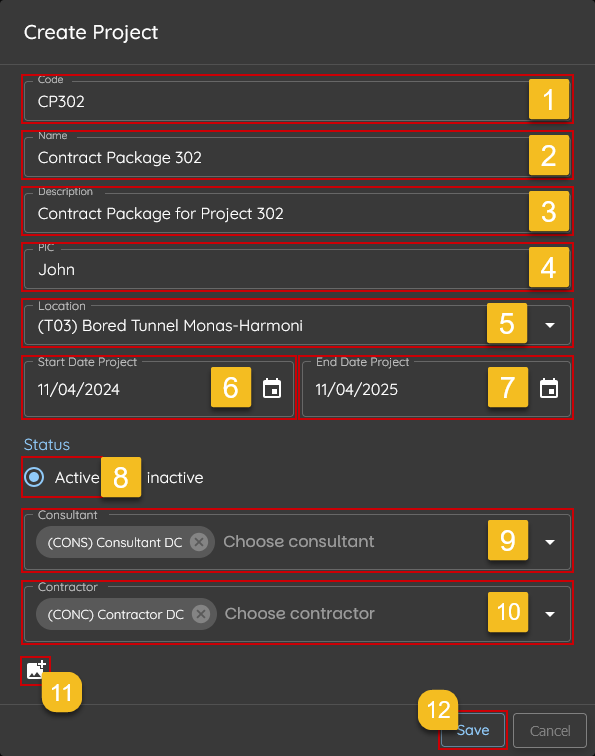
- Owner put a code that will be represented the name of the project that will be created.
- Owner give a name to the project that will be created.
- Owner can put a short description for the project.
- Owner assign user/people in charge (PIC) for the project.
- Owner pick a location that available inside the dropdown list.
- Owner pick a date to start the Project.
- Owner pick a deadline for the project.
- Don't forget to turn the status switch to
Active, so the project are gonna be ready right away. - Owner assign Consultant to start on the project immedietly after the project created.
- Owner also assign Contractor for the project to also start on the project immedietly after the project created.
- Owner can put an image that represent either the company or project; or anytyhing else.
- After the data for the project are inputed correctly, Owner then can click on the
Savebutton.
3. Create a New Project Finished
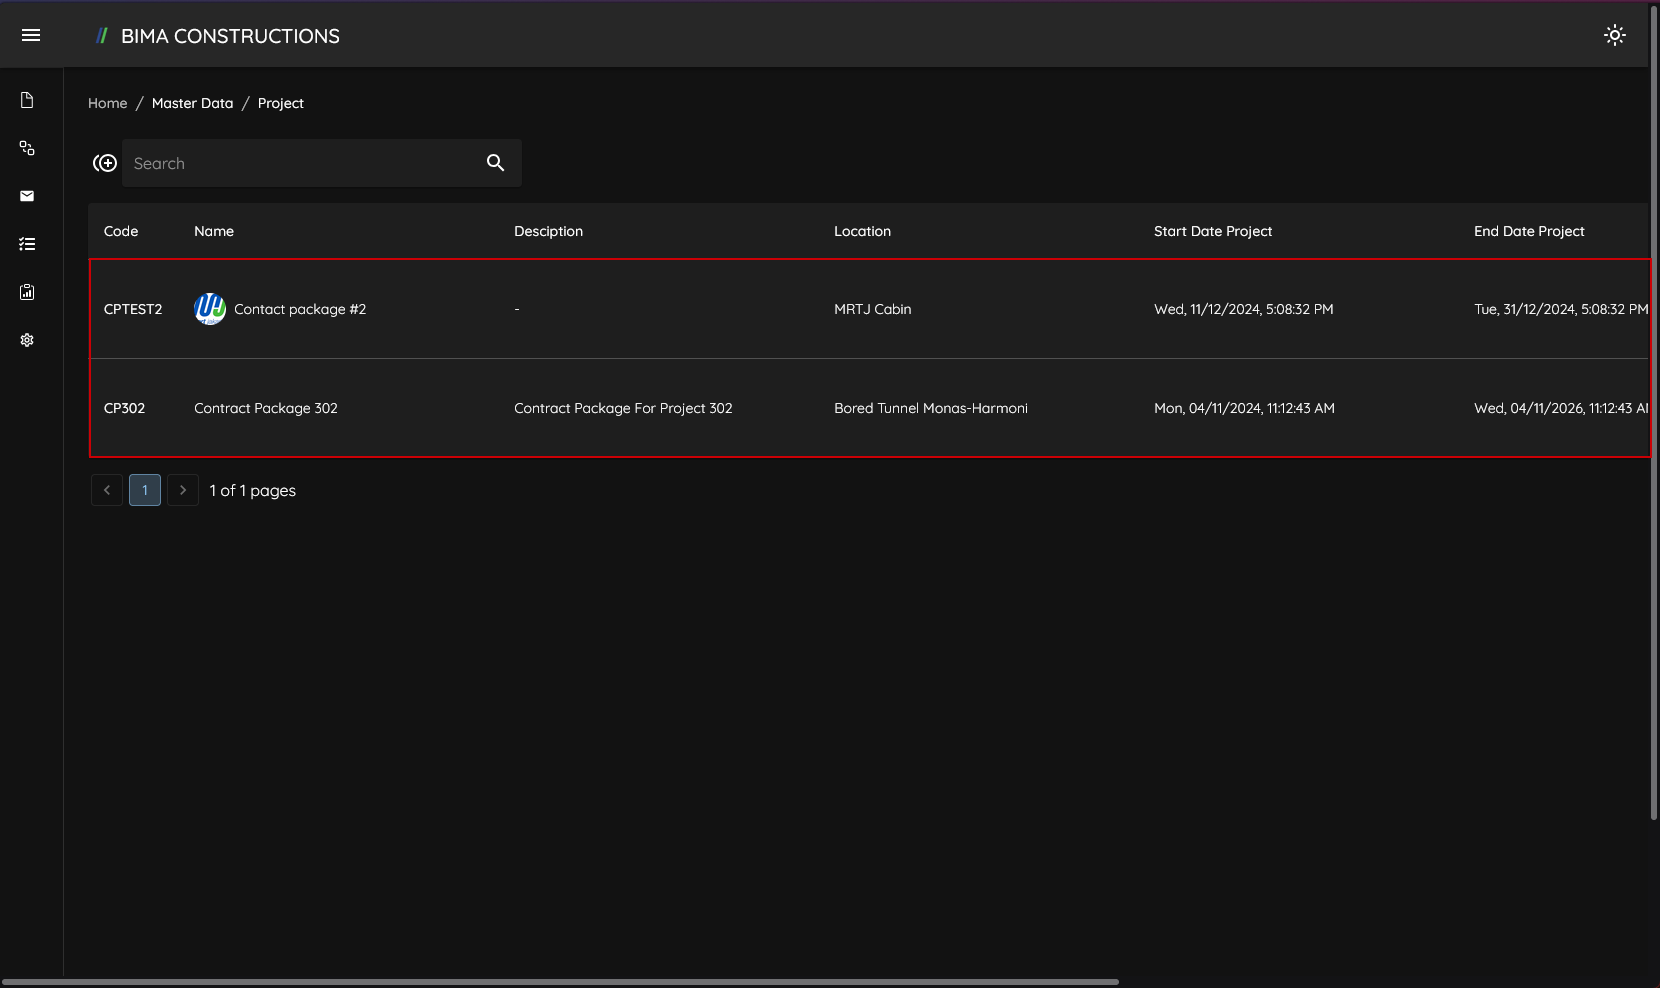 After the USER clicks the
 Save button, the BIMA Construction application will take the USER back to the project list, with the addition of new projects that the user has previously created.