Import Pre-Made Data
Caution
Read Below First
Before importing any data into BIMA Operations, it's crucial for all USERS to have a clear understanding of the type of data they will be entering. This involves identifying whether the data relates to Checksheet, Work Order, or another category.
The data that is to be imported must follow a specific format, especially when it is saved in a .csv file. USERS are encouraged to refer to the example files provided below to ensure their data meets the necessary structure for a successful import.
By adhering to these guidelines and using the example files, USERS can prepare their data effectively for import into BIMA Operations, leading to a smoother and more efficient data management process. Being aware of the data requirements from the start will help avoid errors and enhance the overall workflow.
Preventive Maintenance
MaintenancePeriod.csv
Equipment;Period;Start Date;End Date;Status
MaintenanceSchedule.csv
Equipment;Period;Start Date;End Date;Status
Chechsheet.csv
Question;Reference Value;Answer;Attachments;Status
WorkOrder.csv
Equipment;Period;Schedule At;SAP WO
Assets
System.csv
Name;Code;Description
SubSystem.csv
System;Name;Code;Description
AssetType.csv
System;Sub System;Name;Code;Description
Asset.csv
System;Sub System; Equipment Type;Name;Code;Description;Asset Tag;Department
Material Information
Material
Name;Code;Quantity;Unit;Status
Tools.csv
Name;Code;Status
Import How To
1. Go to any page that had an Import Excel button.
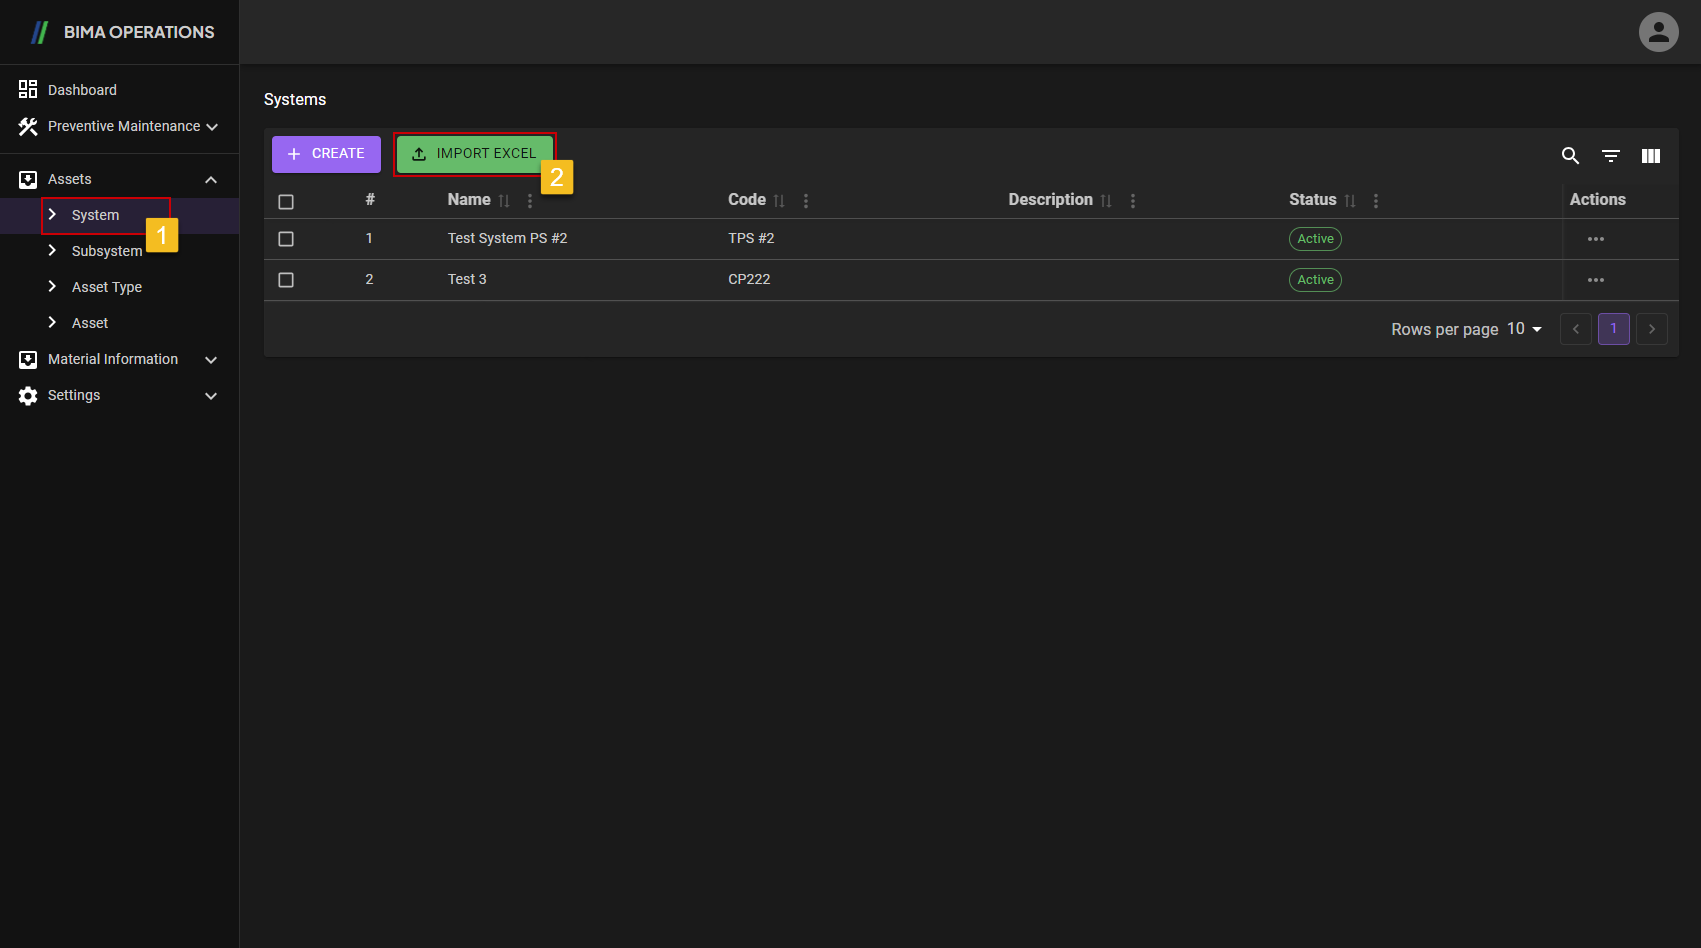
- Planner click on menu button that had an
Import Excelbutton. - Once inside Planner can immediately click on the
Import Excelbutton, to start theImportingprocess.
2. Select a File
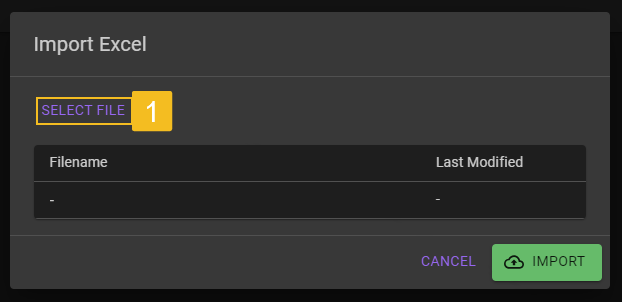
- Once the
Import Excelpanel appear, Planner can click on theSELECT FILEbutton, to start choosing a file.
3. Choose File
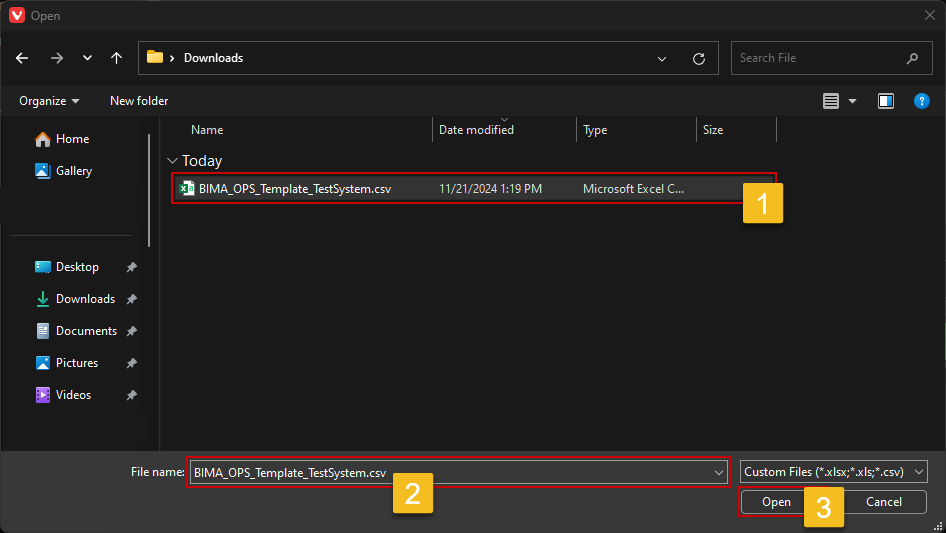 Before choosing any file that Planner want to import, make sure to read Caution first and match the data format with the format of the page that Planner want to import it to.
Example

- Choose the file that Planner want to import to the desired page.
- Make sure the data are correct.
- After making sure that all the data already following the format on the Caution part, Planner can click on
Opento select the file.
4. Make Sure the File Are Correct
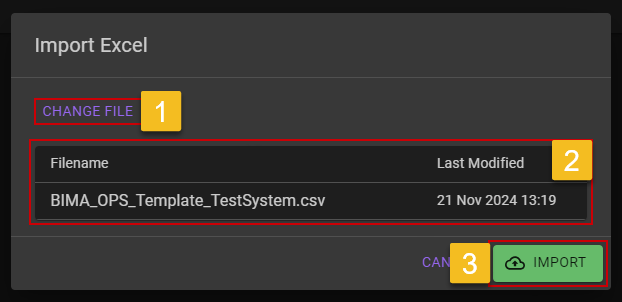
- If Planner feel the data is indeed incorrect, Planner can click on
CHANGE FILEto change the file. - Make sure the file are correct.
- After making sure that the file are the correct one, Planner can click on
IMPORTbutton to finalize theImportProcess.
5. Checking the Updated List

- Planner will got a notification
Import success:[data] new system. - Planner can check on the list are the updated part is there or not.