Maintenance Period
Intro
Before begining the create schedule process, Planner need to know that there are 2 methods of inserting a new equipment schedule:
- First inserting them manually by clicking on the
+ CREATEbutton. - Second, insert it using the Import Excel function by clicking the
IMPORT EXCELbutton.
To do the manual process Planner can see the instruction below.
If by any chance Planner want to enter it by using the IMPORT EXCEL function, Planner needs to follow the instruction that are available using this link --> Import Pre-Made Data.
Create New Equipment Schedules
1. Go To Maintenance Period Page
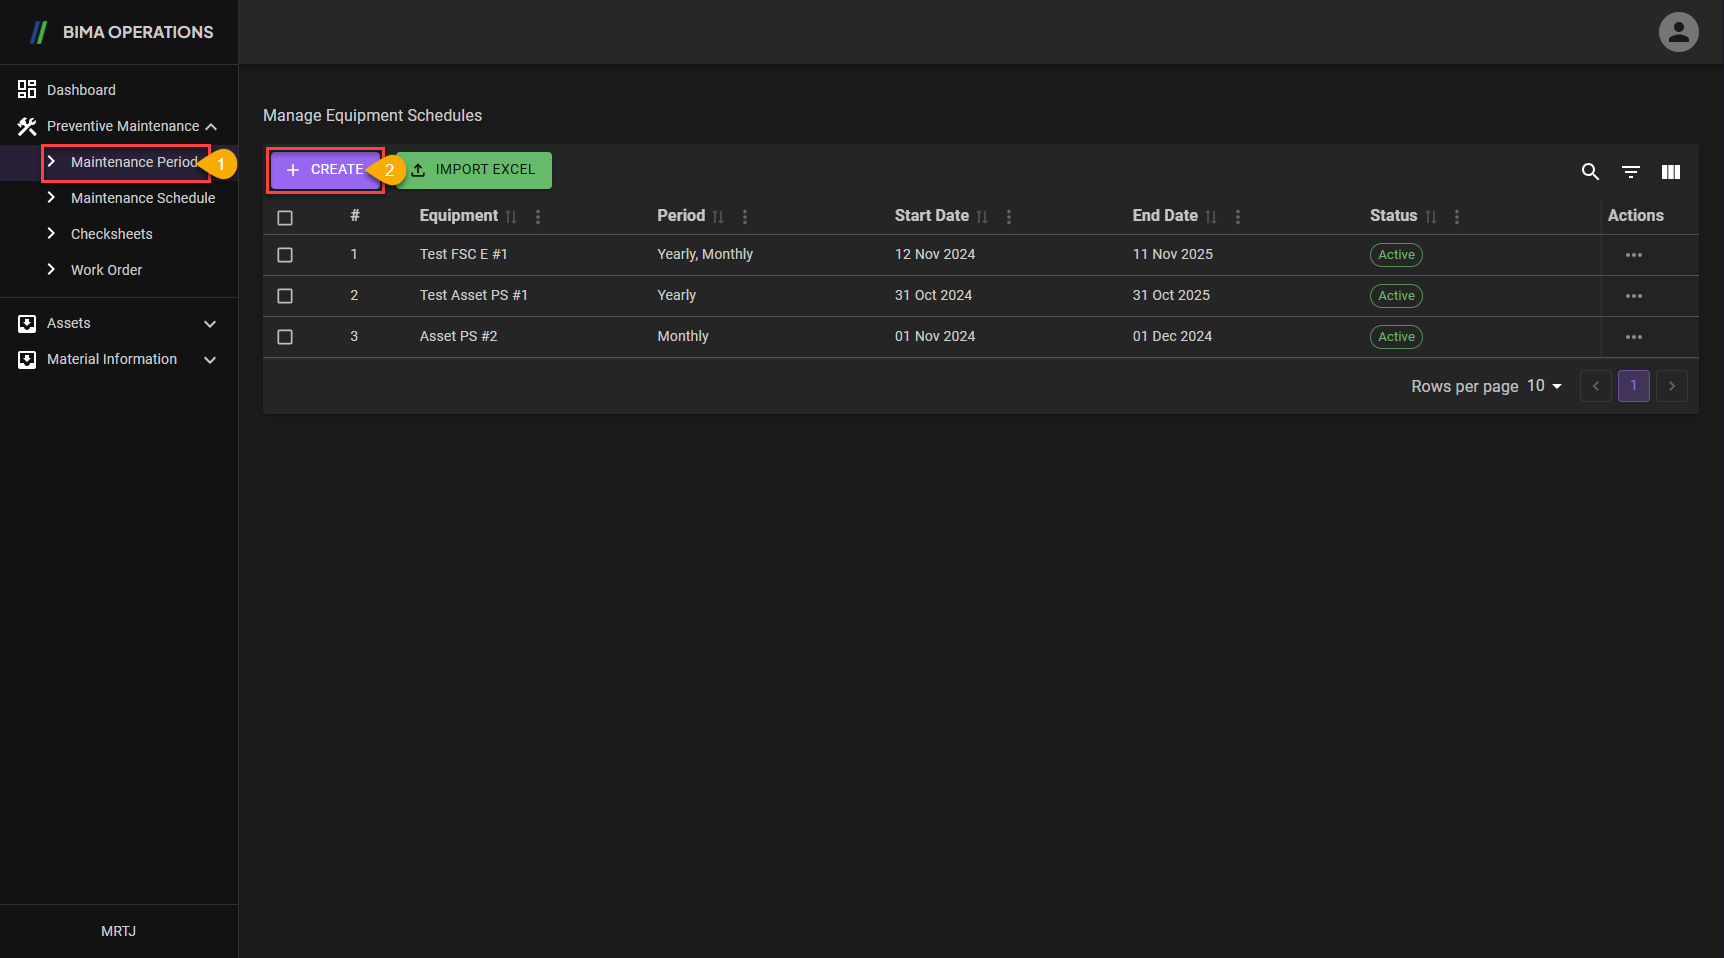
- Planner can go to the
Maintenance Periodpage by clicking theMaintenance Periodbutton located under thePreventive Maintenancemenu. - Once on the
Maintenance Periodpage, Planner can then click theCREATEbutton to open theCreatepanel.
2. Create New Schedules
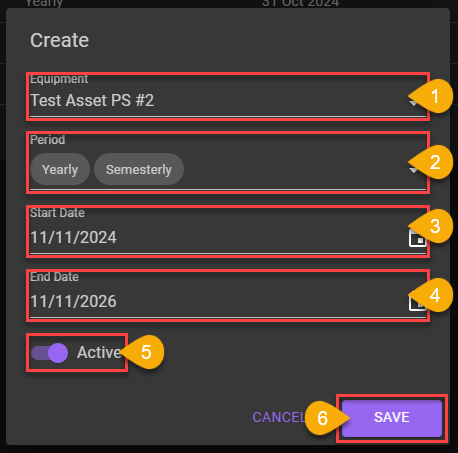
- From the dropdown list, Planner choose what type of equipment that are gonna be created a schedule of.
- From the dropdown list, Planner choose what periods will the equipment need for the creation of the new schedule.
- Choose when the start date for the schedule.
- Choose when the end date for the schedule.
- Don't forget to turn the switch on so the new
Schedulewill be Active when Super Admin/Planner/Section Head want to use it for creating newWork Order. - After checking all the data inputed, Planner can click on the
SAVEbutton to save the new schedule that was created.
3. Creating New Schedules Finish
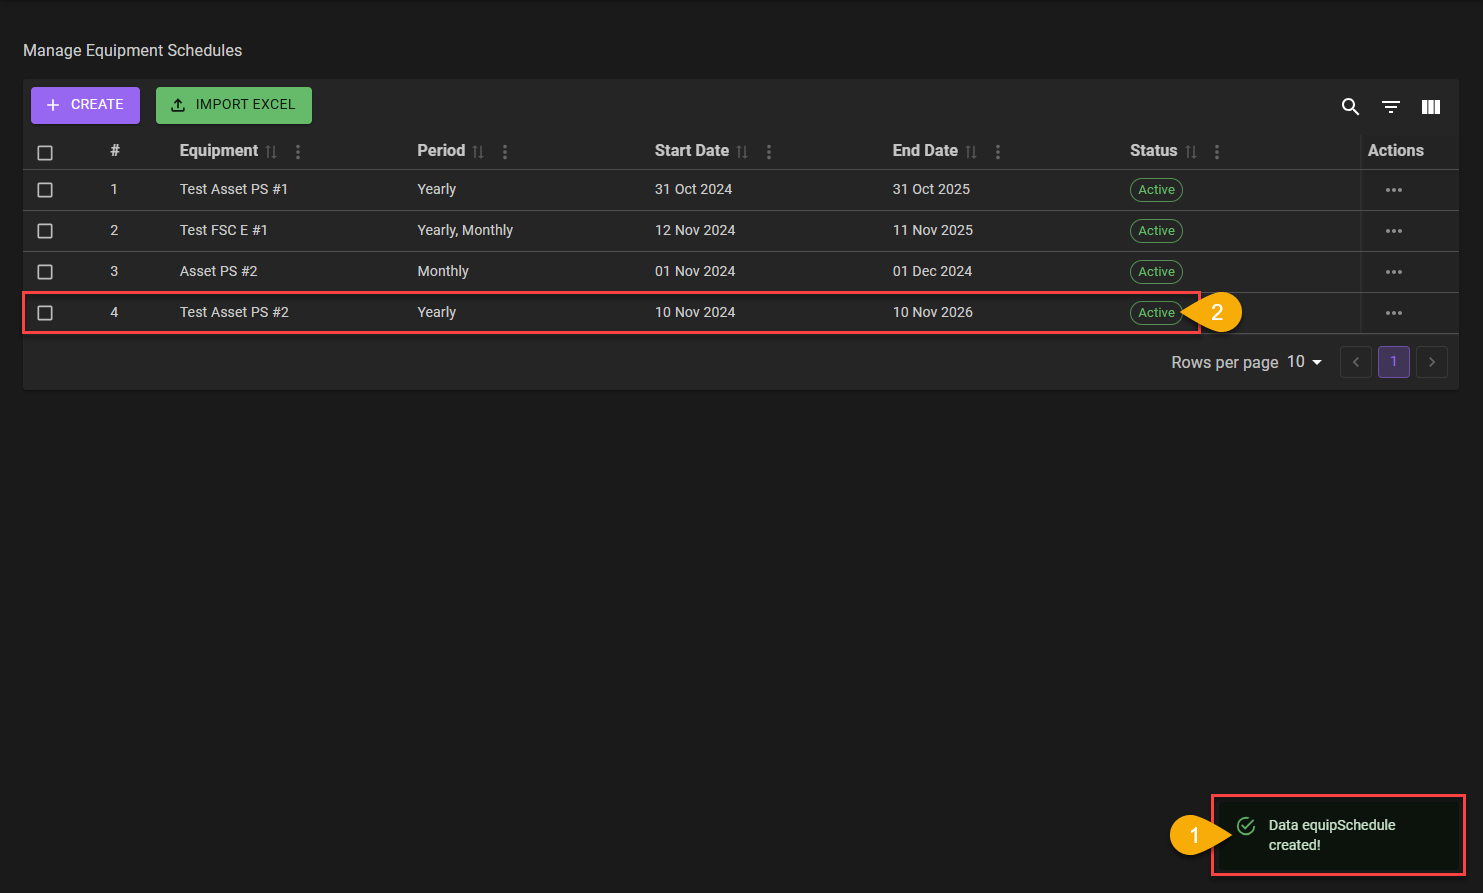
- The
Create New Schedulesprocess are finish, marked with the notification the USER got, which isData equipSchedule created!. - The USER also need to make sure the list are updated with the item the USER had created.