Maintenance Schedule
Create Work Order
1. Open Create Work Order Panel
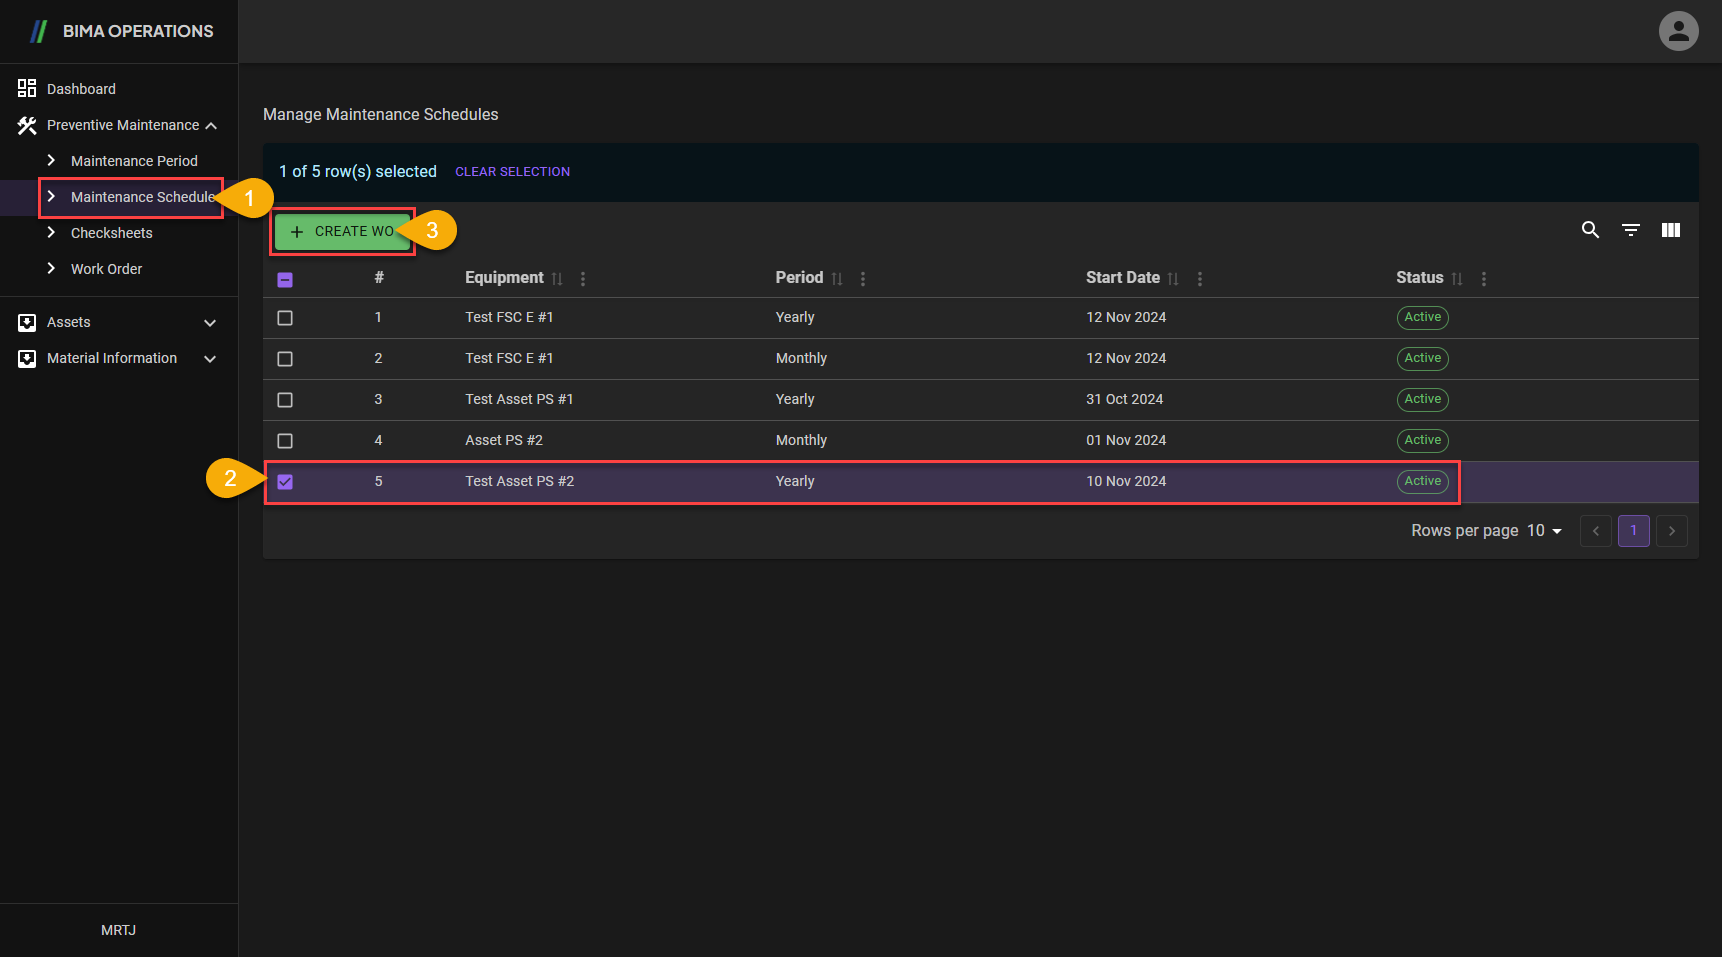
- Planner clicks on the
Maintenance Schedulemenu button located under theMaintenance Periodmenu. - After opening the
Maintenance Schedulepage, Planner can select any equipment for which they want to create aWork Order. - After finishing selecting, Planner can click the
+ CREATE WObutton to open theWork Orderpanel.
2. Create Work Order
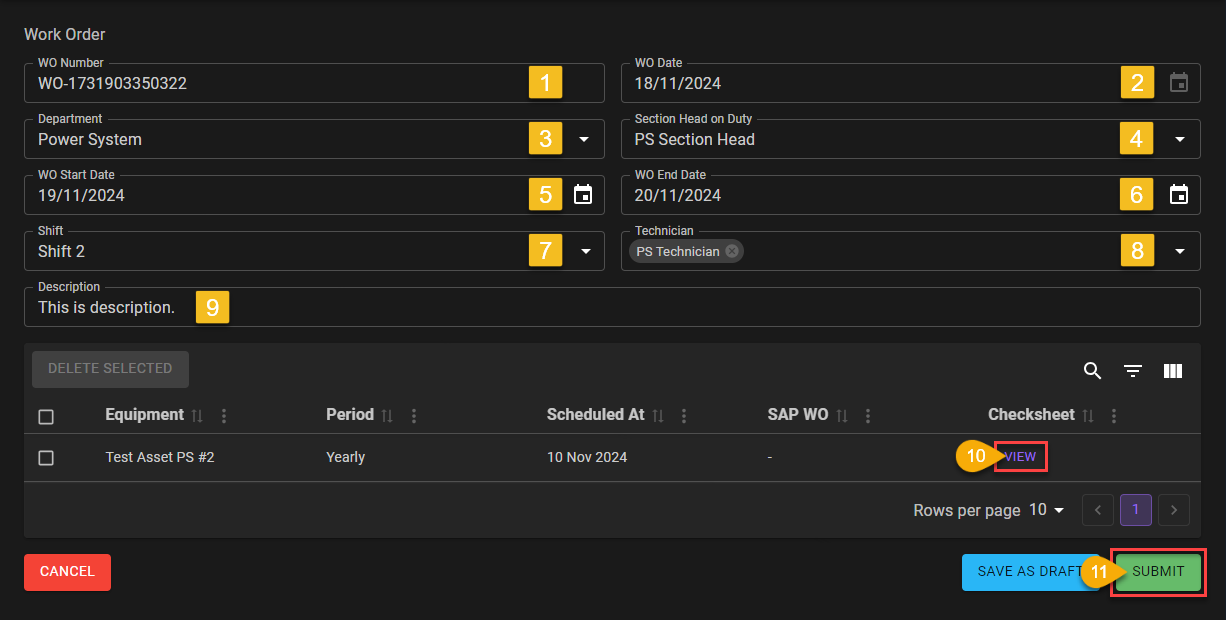
WO Numberor Work Order number will be automatically generated by the system, as soon as Planner clicks on the+ Create WObutton.- Same as
WO Number,WO Datewill also be automatically generated by the system after Planner clicks on the+ Create WObutton. - Planner can choose which department the Work Order will be assigned/submitted to. In this case the task will be given to
Power System. - In the
Section Head on Dutycolumn, you can choose based on who will be given the related responsibility for the task to be given. - can provide the start time for the task to be given.
- Planner can also determine the deadline for the task.
- In this field Planner can set the schedule for assigning tasks to be handed over to certain shift technicians.
- In this field Planner assigns tasks to certain technicians to work on related tasks.
- In this field Planner can provide a brief description of the task to be given.
- After the entire process is considered complete Planner can complete the process by clicking the
SUBMITbutton.
3. Work Order Created.
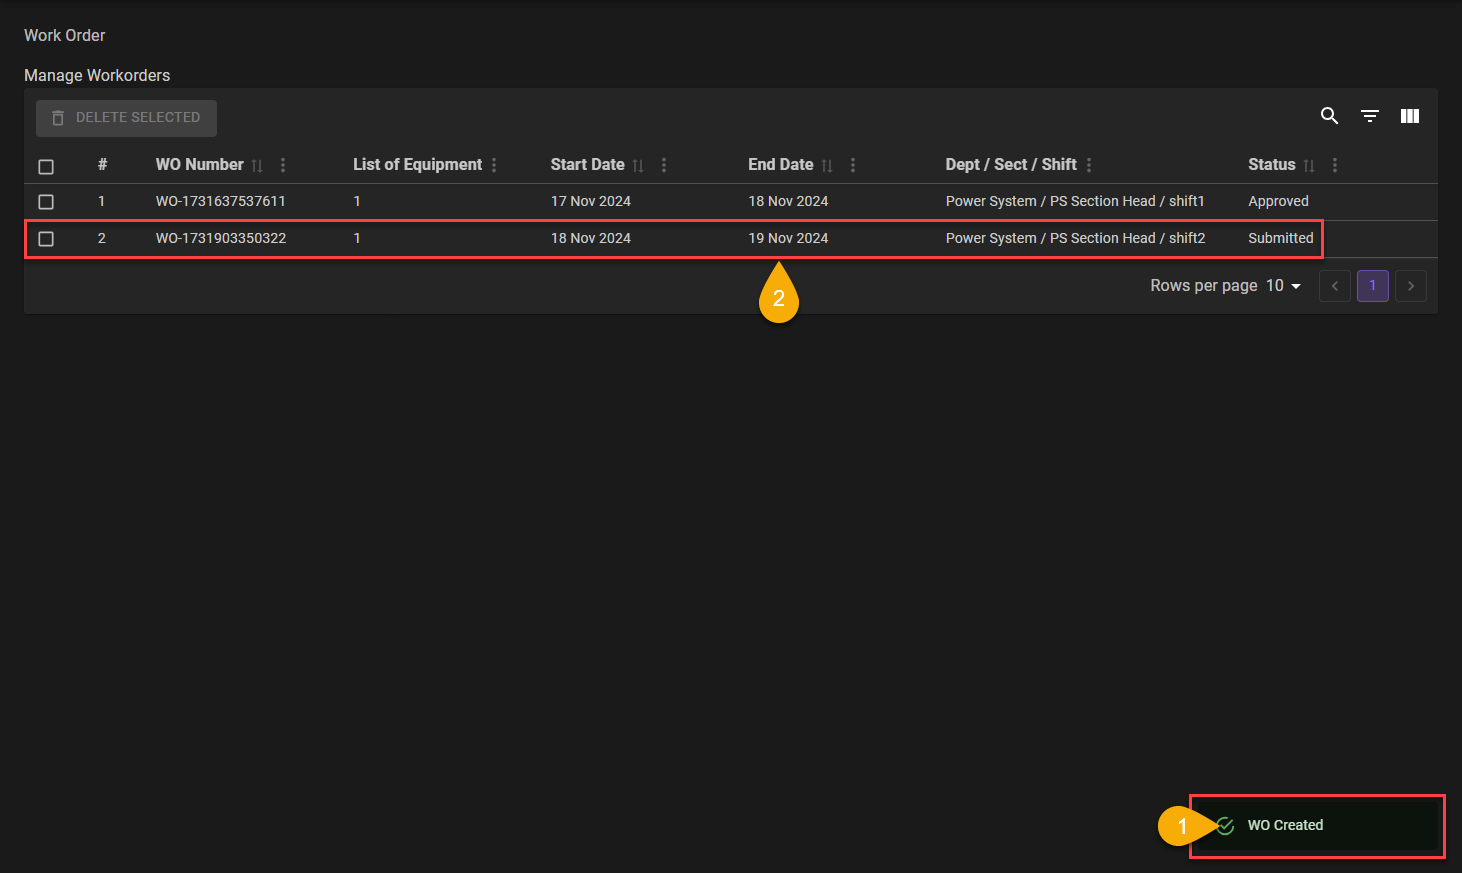
- The
Work Orderare created, marked with the notification the Planner got, which isWO Created. - The Planner also need to make sure the list are updated with the item the Planner had created.