Material
Add New Material
1. Go To Material Page
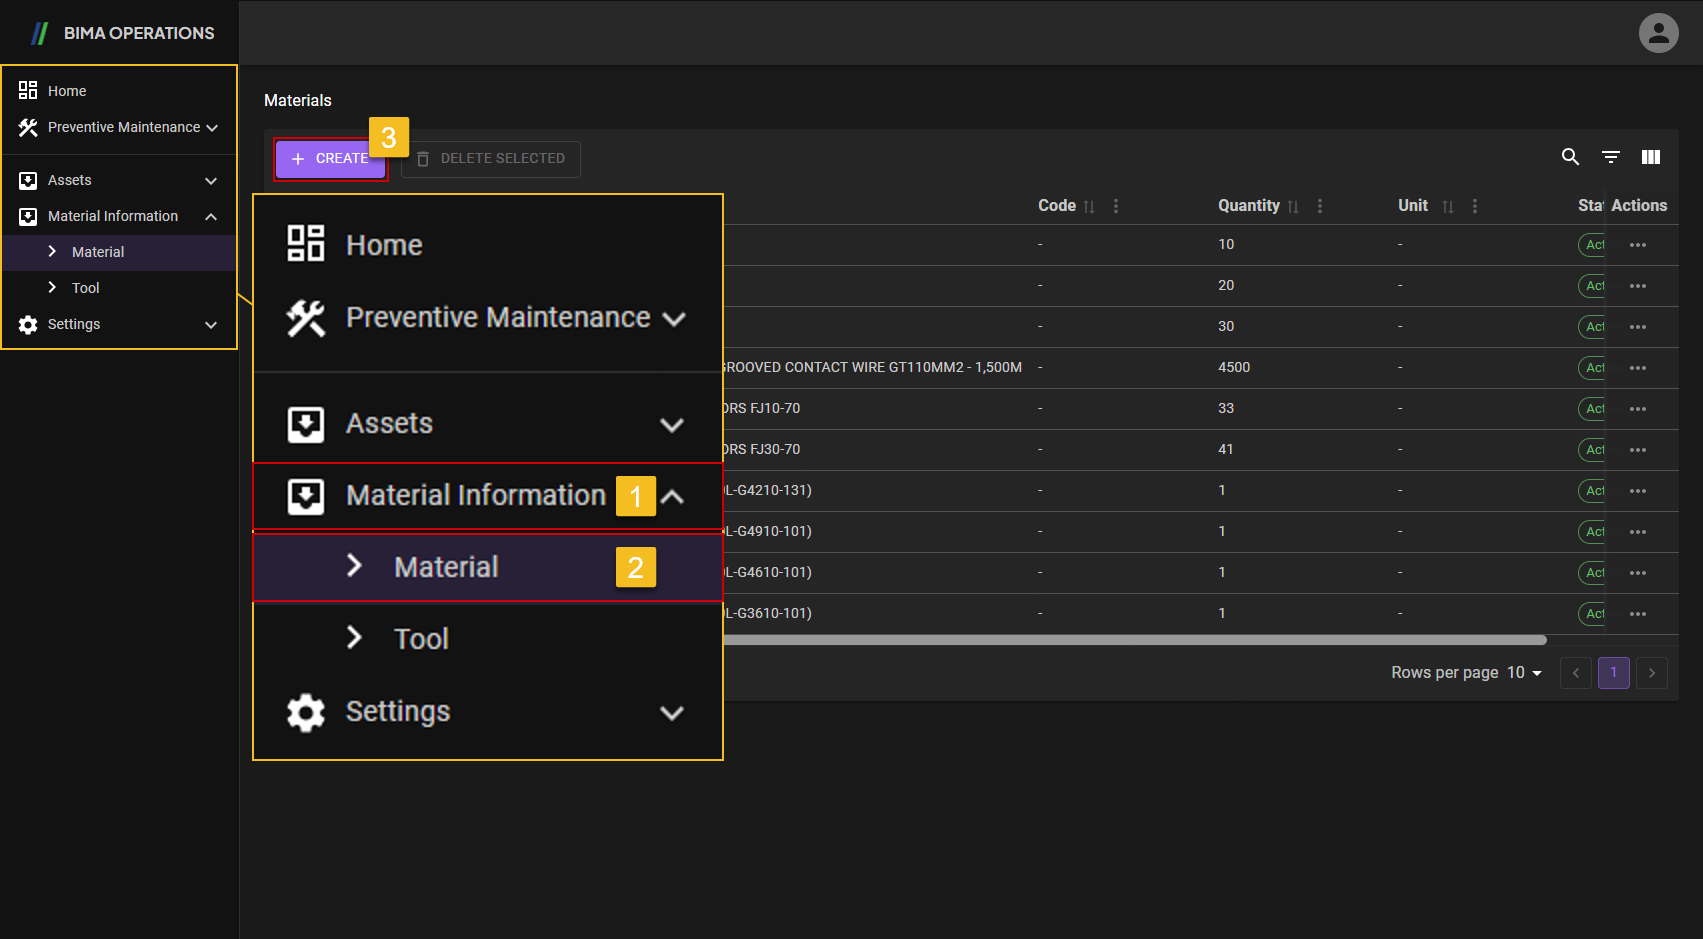
- Planner can click on the
Material Informationmenu to open the dropdown list of menu insideMaterial Information. - Planner then can click on the
Materialmenu to go to theMaterialpage. - After opening up the Material page, Planner can click on the
+ CREATEbutton located upper left of the page to open up theCreate Materialpanel.
2. Add/Create Material.
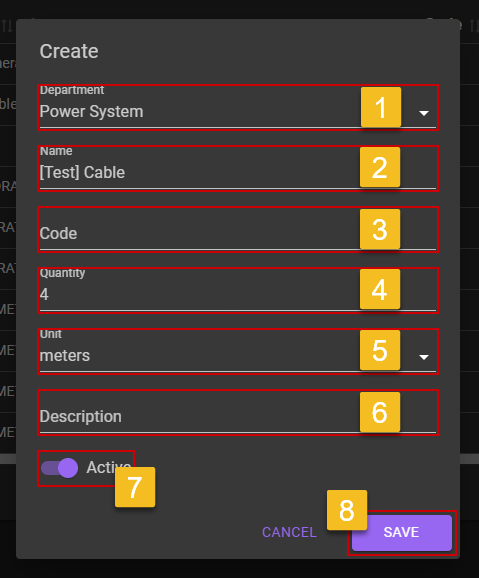
- Planner choose any department available on the dropdown list. The department choosen are a department of which the item will be located at.
- Planner input a name of the
Materialthat are gonna be put on the department choosen. - Planner input a code which represent the
Material. - Planner input how much the material will be added to the department.
- Planner input on the count unit that represent the
Material. - Planner can put a short description of the
Material. - Don't forget to turn the switch on, so the new
Materialwill be Active when Super Admin/Planner/Section Head want to use it for creating newWork Order. - After checking all the data inputed, Planner can click on the
SAVEbutton to save the newToolthat was added.
3. Add/Create Material Finish
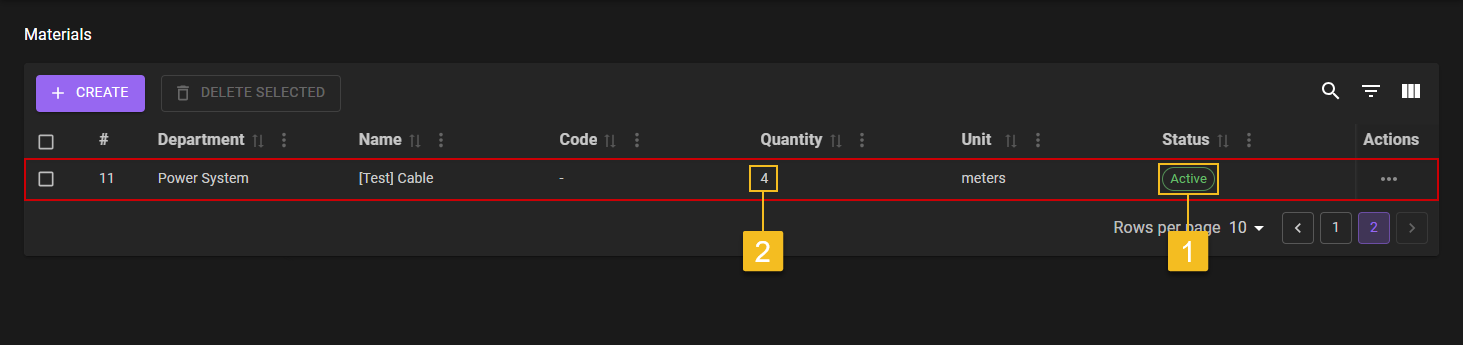 The
The Add/Create Material process finish.
- After adding a new material, the finish process are marked by the presence of the new material and
Activestatus on the list. - After adding an existing material, the finish process are marked by the increasing amount of
Quantitycolumn.
Edit Material
1. Choose Tool That Need to Edit
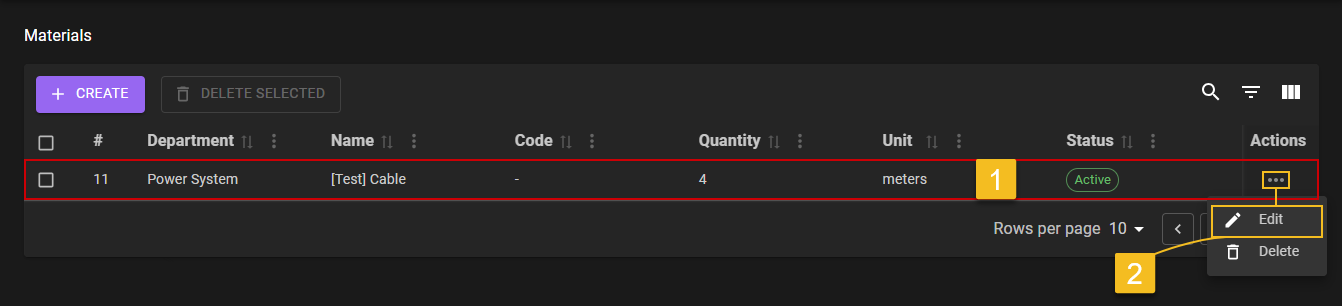
- Planner choose on what
Materialsneeds to be edited. - After clicking on the
Three-Dotaction menu Planner then can click on theEditaction menu.
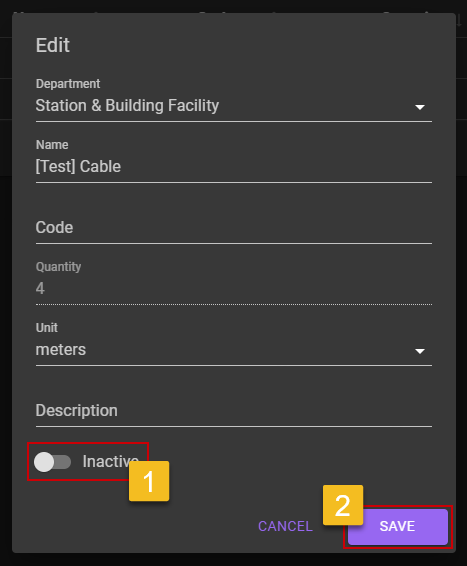
2. Choose What Field Need to Edit

- Planner edit the
Materials. - If Planner already make sure that the data inputed correctly, Planner can click on the
Savebutton
a. Deactivate Material
- Planner can flick the
Statusswitch to off, if Planner want to deactivate theMaterials.- Planner then can click on the
SAVEbutton to saving theMaterialson anInactivestatus.b. Material Deactivated
- After Planner deactivate the
Tools, a notification will come out which isData Material [number] updated!, it means theEditprocess are sucessfuly save.- To make sure even more, Planner can check on the
Statuscolumn of the whichMaterialto see if it is on anInactivecondition.

3. Confirm Edit
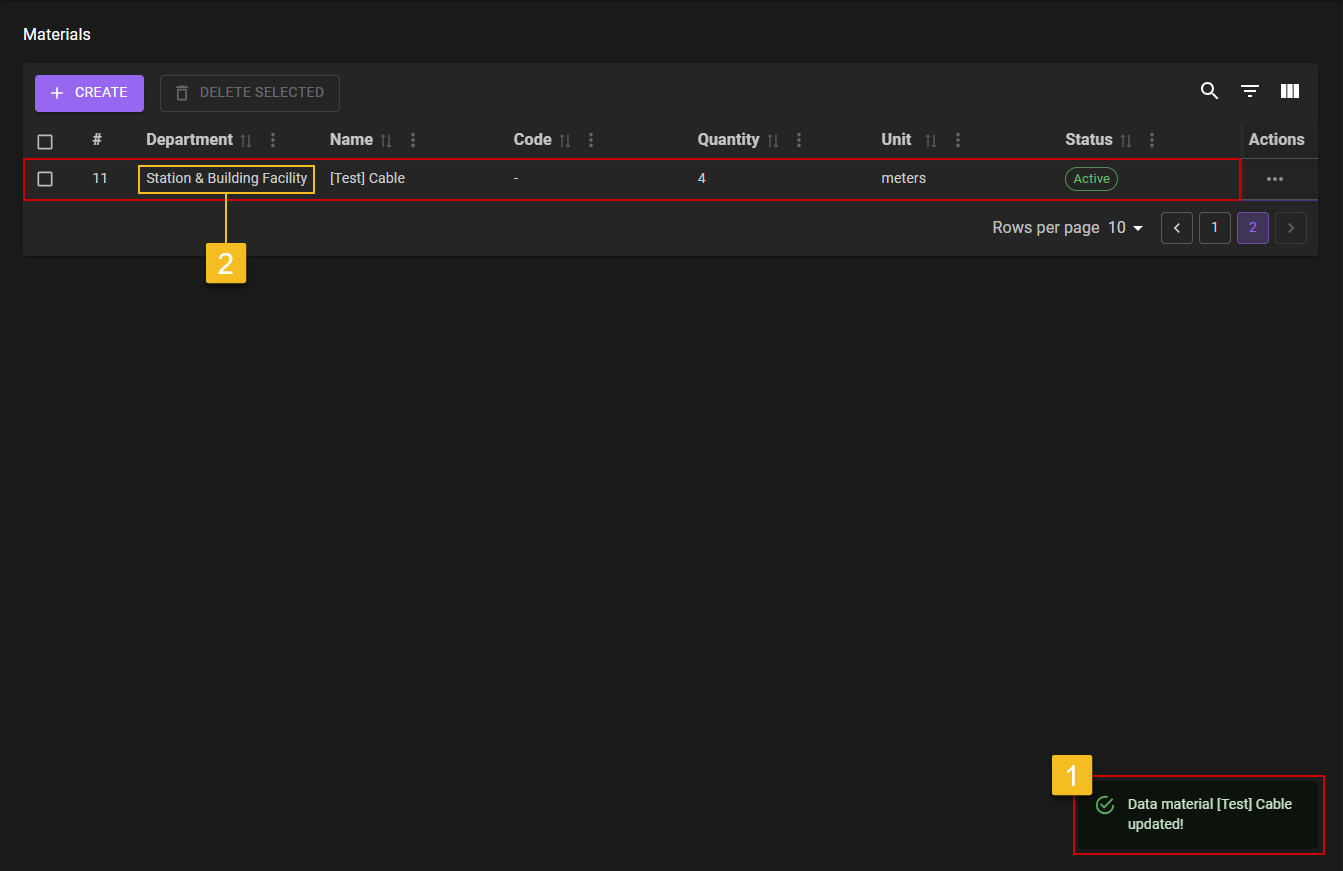
- After Planner click the
SAVEbutton, a notification will came out which isData material [number] updated!. - To make sure even more, Planner can check on the list of the
Materialif the edited part are updated on the list.
Delete Material
1. Choose Material That Need to be Delete

- Planner choose on what
Materialsneeds to be deleted. - After clicking on the
Theree-Dotaction button Planner then can click on theEditaction menu.
2. Delete Material
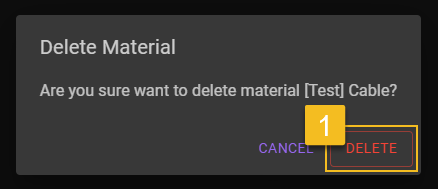
- After clicking on the
Deletebutton, confirmation popup will be shown. Planner can chooseDELETEbutton to confirming it.
3. Confirm the Deletion of Material
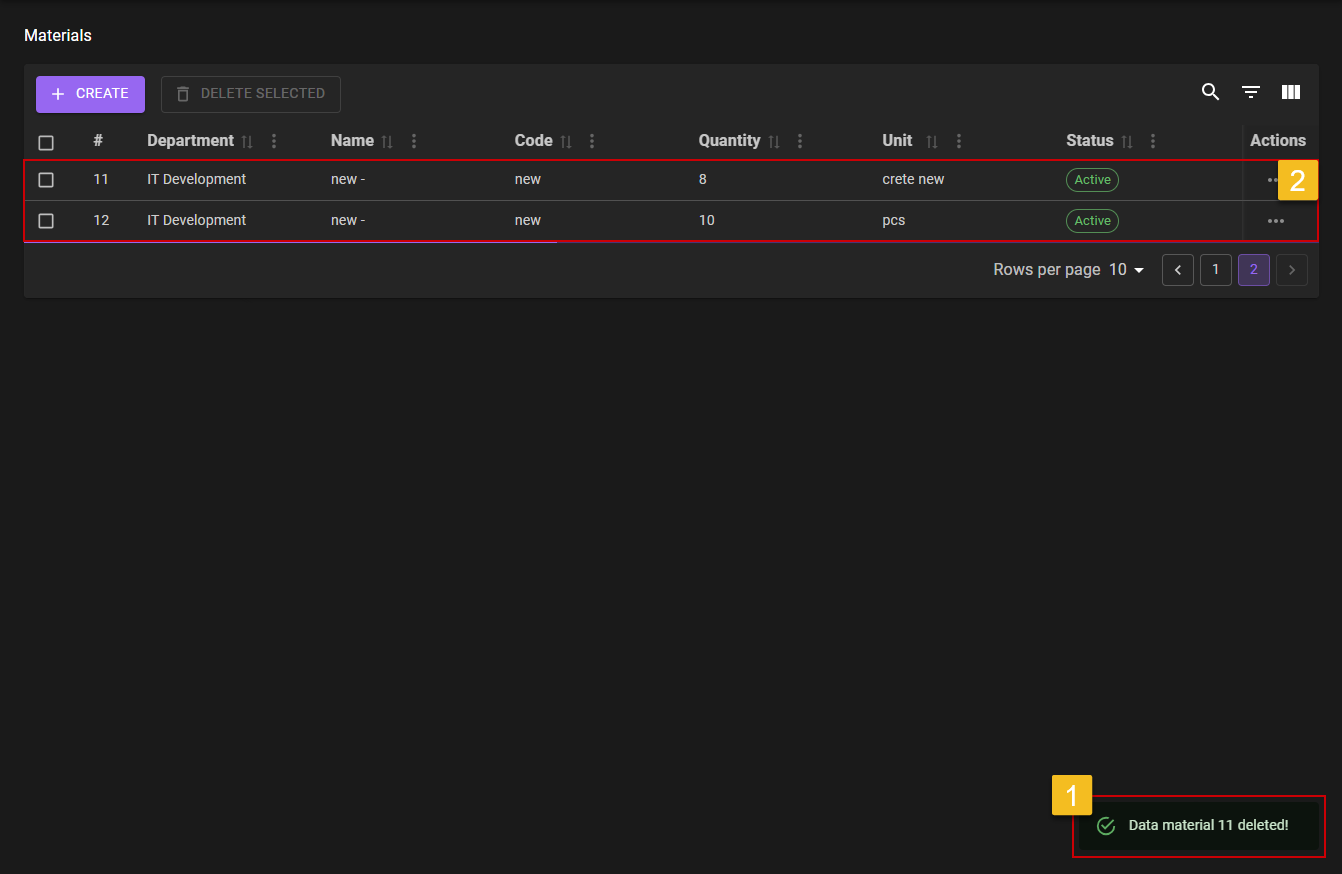
- Planner will got a notification
Data Material [number] deleted!. - Planner can check on the list are the updated part is there or not.