Location
Add Location
1. Go To Location Page
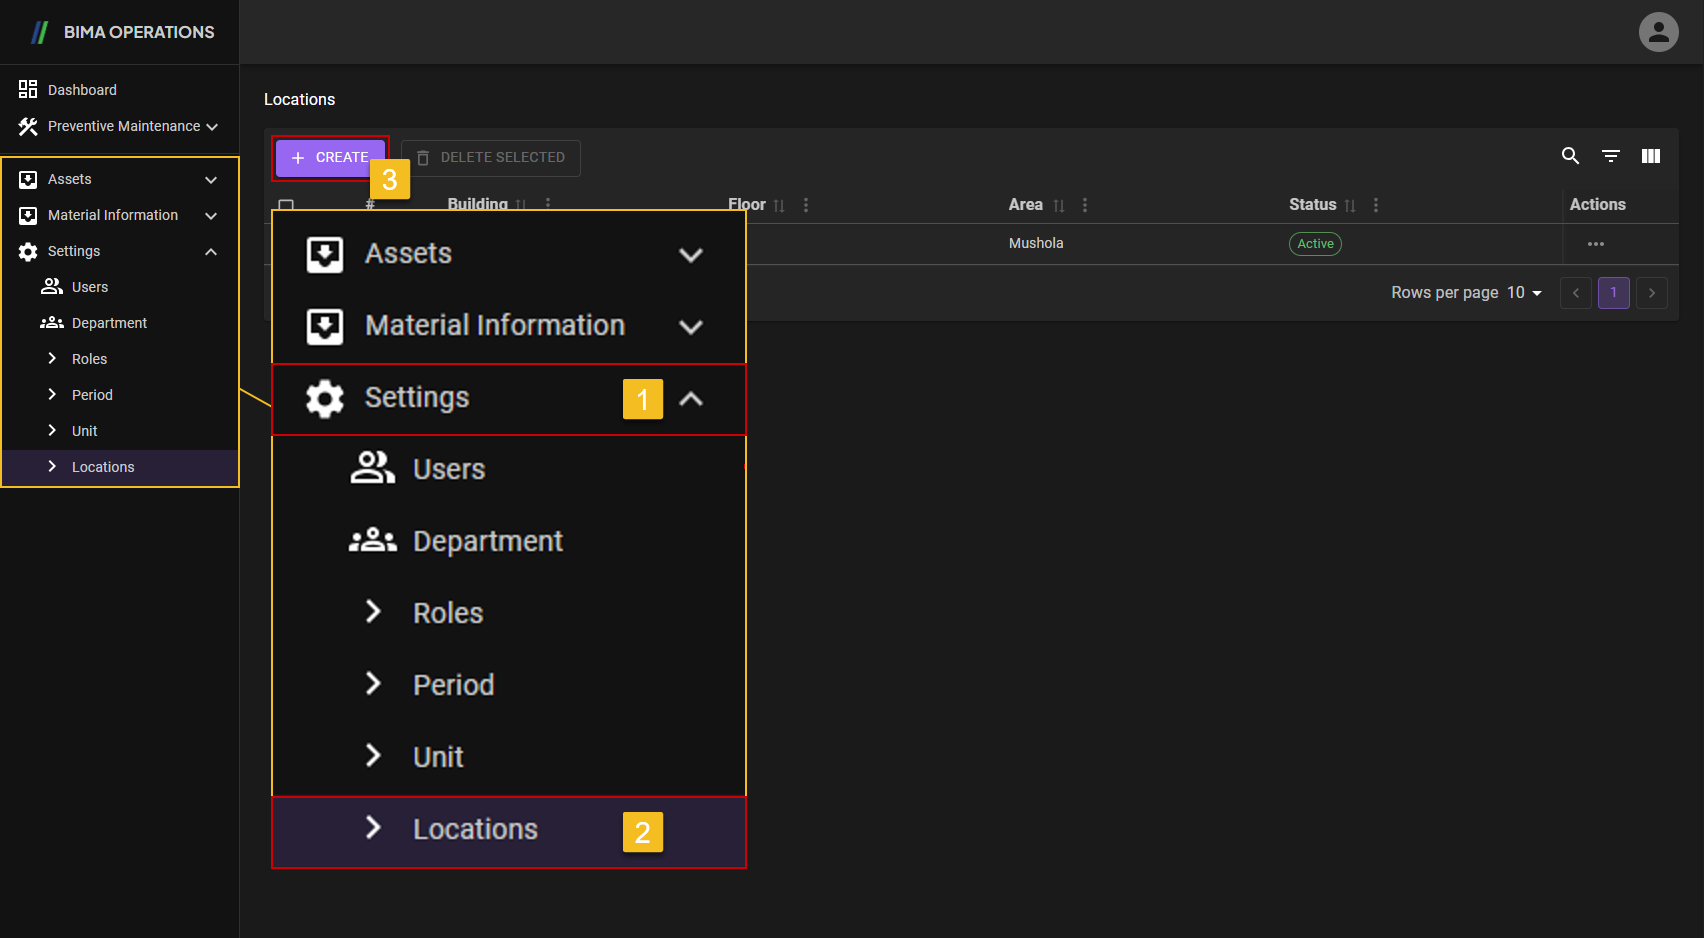
- Super Admin can click on the
Locationsmenu button located inside theSettingsmenu to go to theLocationpage. - Super Admin can click on the
CREATEbutton to display theCREATEpanel.
2. Create the New Location
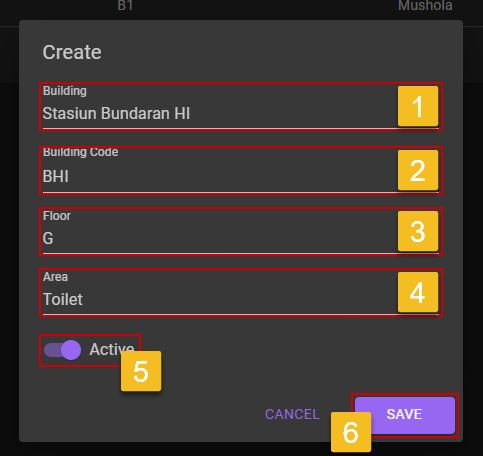
- Super Admin input a new building name into the input field.
- Super Admin input the building code for the new location.
- Super Admin input floor of the new location.
- Super Admin input on what area are the new location is located.
- Don't forget to turn the switch on, so the new Location will be Active when Super Admin/Planner/Section Head want to use it for adding new asset, creating work order, or else.
- After checking all the data inputed, Super Admin can click on the
SAVEbutton to save the new Location that was created.
3. Checking the New Location
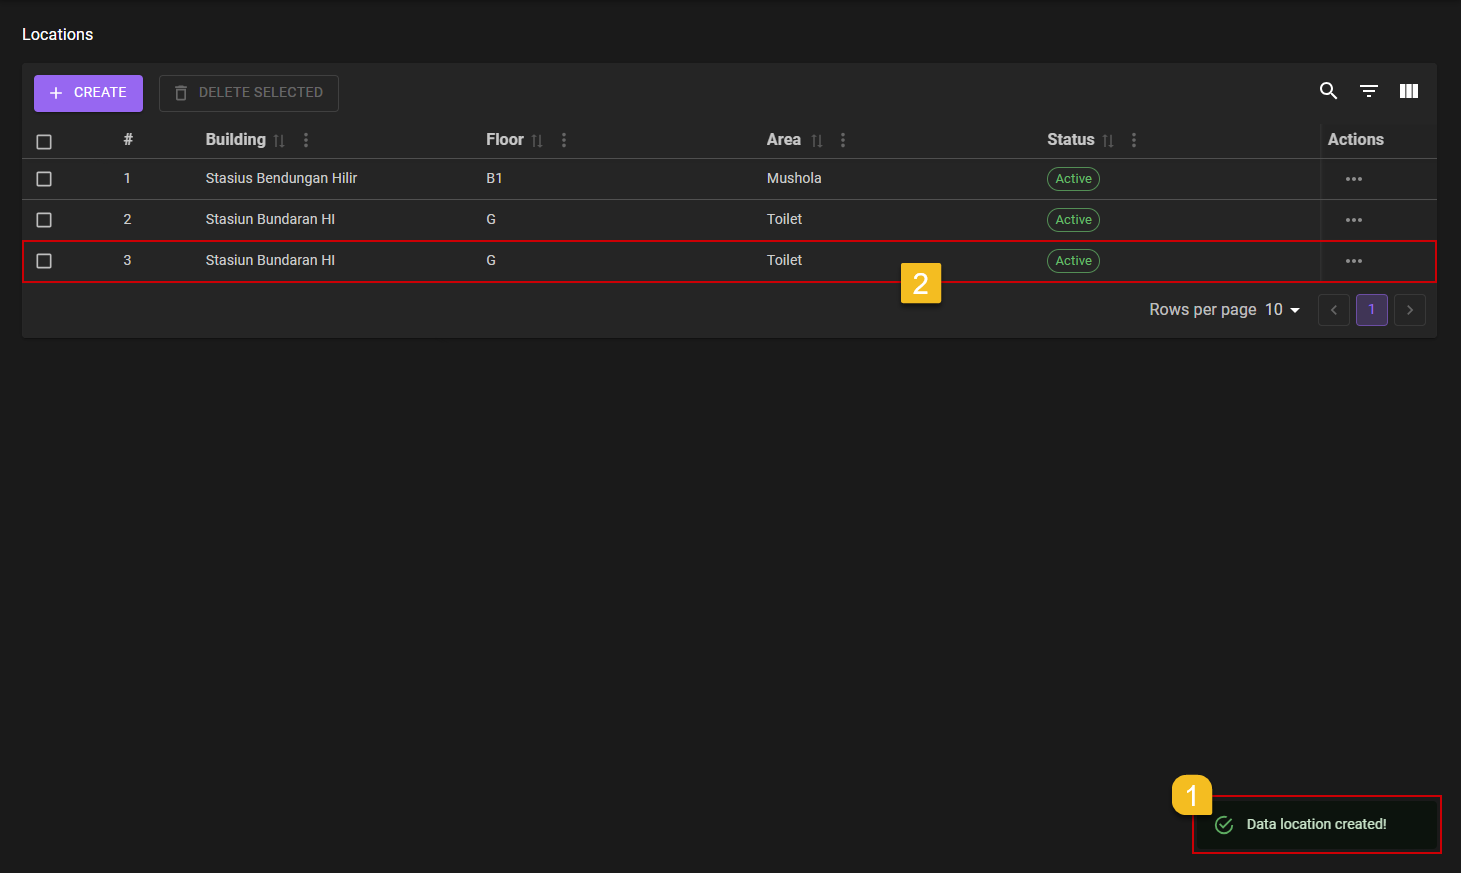
- After saving the new
LocationUSER will got a notificationData location created!. - Make sure the new
Locationare successfully created by looking on the list to see if theLocationare updated into the list or not.
Edit Location
1. Choose Unit That Need to Edit
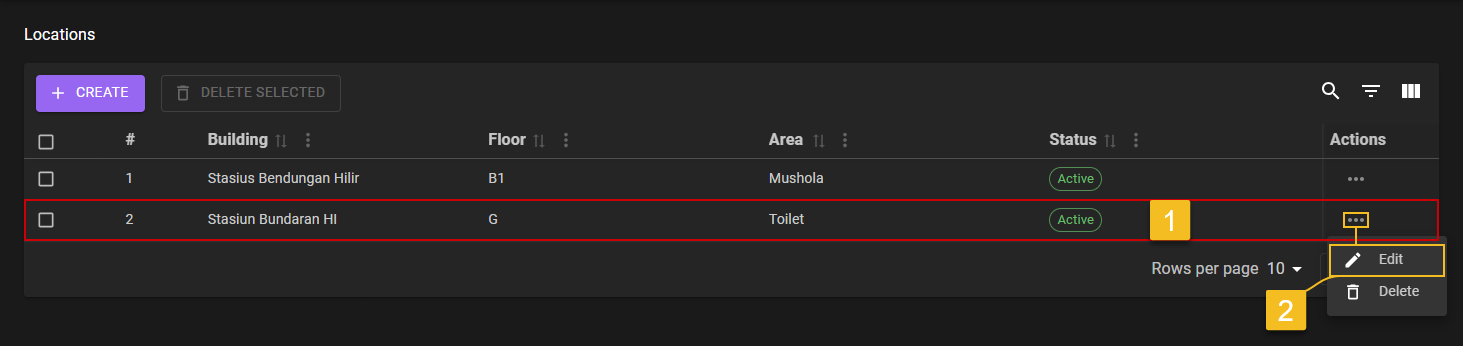
- Super Admin choose on which
Locationneeds to be edited. - Click on the
Three-Dotaction button Super Admin then can click on theEditaction menu.
2. Choose What Field Need to Edit
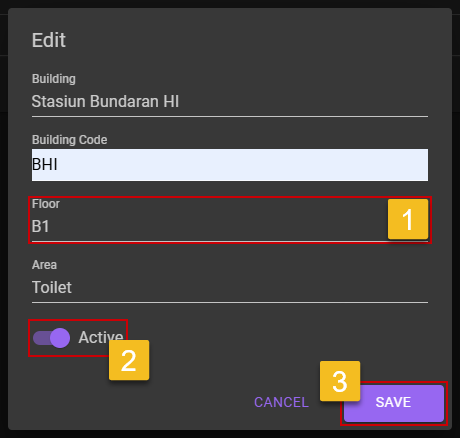
- Super Admin edit the
Location. - If Super Admin already make sure that the data inputed are all corerect, Super Admin can click on the
SAVEbutton.
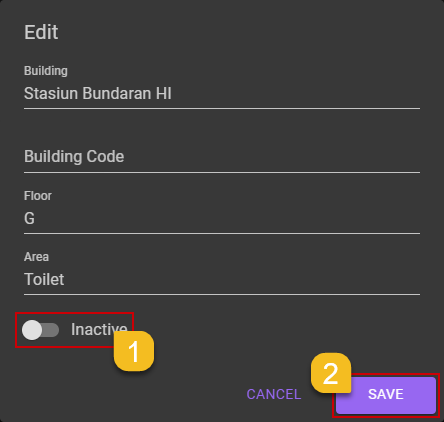
a. Deactivate Location
- Super Admin can flick the
Statusswitch to off, if Super Admin want to deactivate theLocation.- Super Admin then can click on the
SAVEbutton to save the newLocationon anInactivestate.b. Location Deactivated
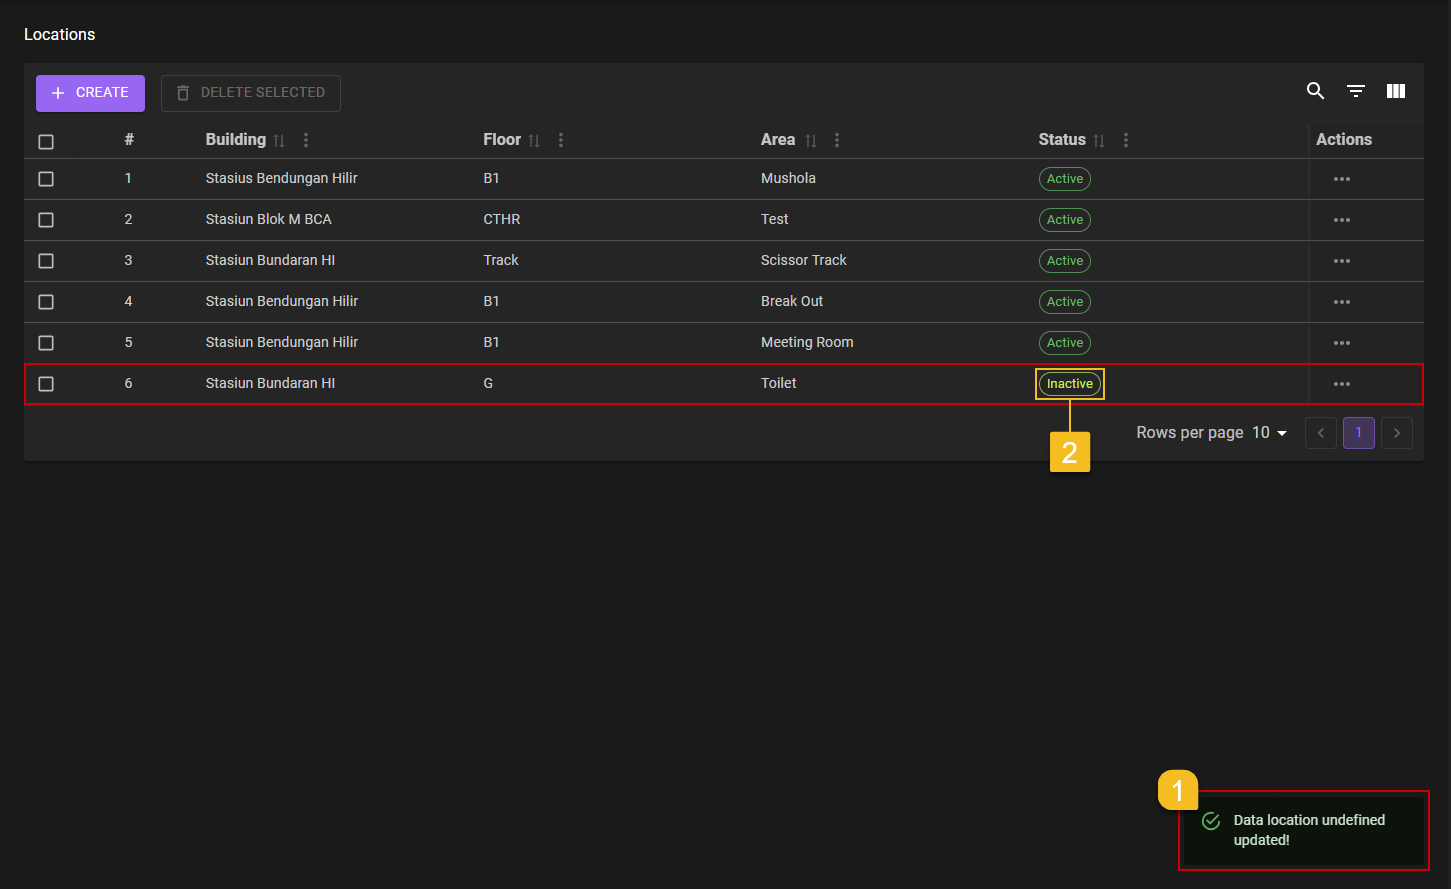
- After Super Admin deactivate the
Location, a notification will come out which isData Location [number] updated!, it means the editedLocationare saved successfully.- To make sure even more, Super Admin can check on the
Statuscolumn of the whichLocationto see if it is on anInactivecondition.
3. Confirm Edit
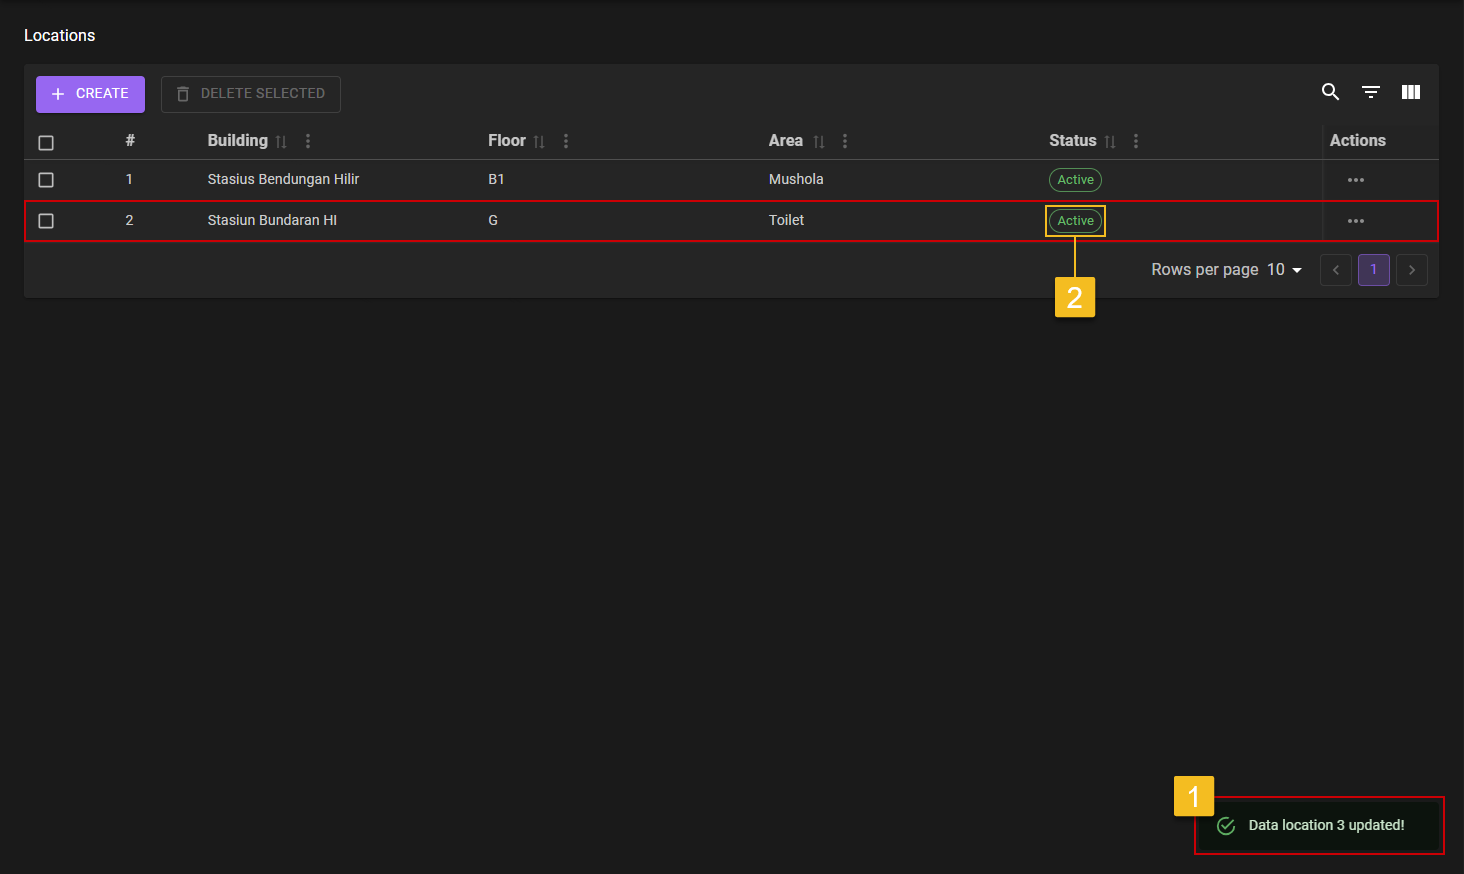
- After Super Admin click the
SAVEbutton, a notification will came out which isData Location [number] updated!. - To make sure even more, Super Admin can check on the list of the
Locationif the edited part are updated on the list.
Delete Location
1. Choose Location That Need to be Delete
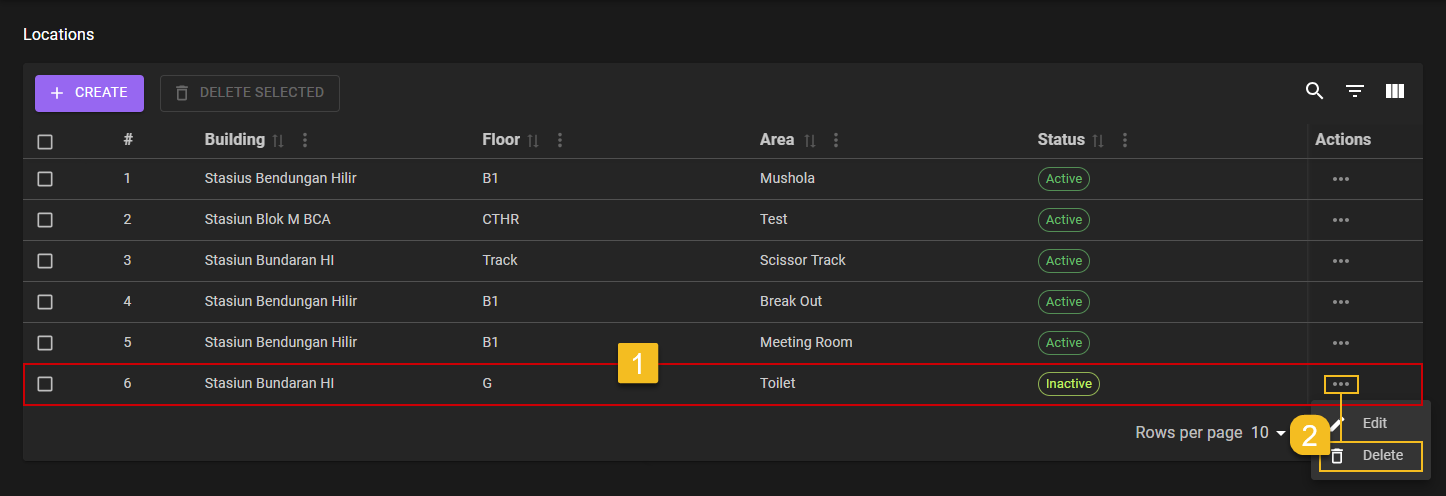
- Super Admin choose on what
Locationneeds to be deleted. - After clicking on the
Three-Dotaction button Super Admin then can click on theEditaction menu.
2. Delete Location
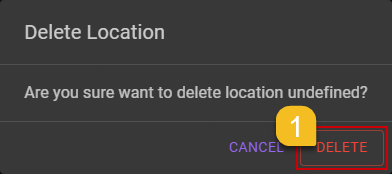
- After clicking on the
Deletebutton, confirmation popup will be shown. Super Admin can chooseDELETEbutton to confirming it.
3. Confirm the Deletion of Location
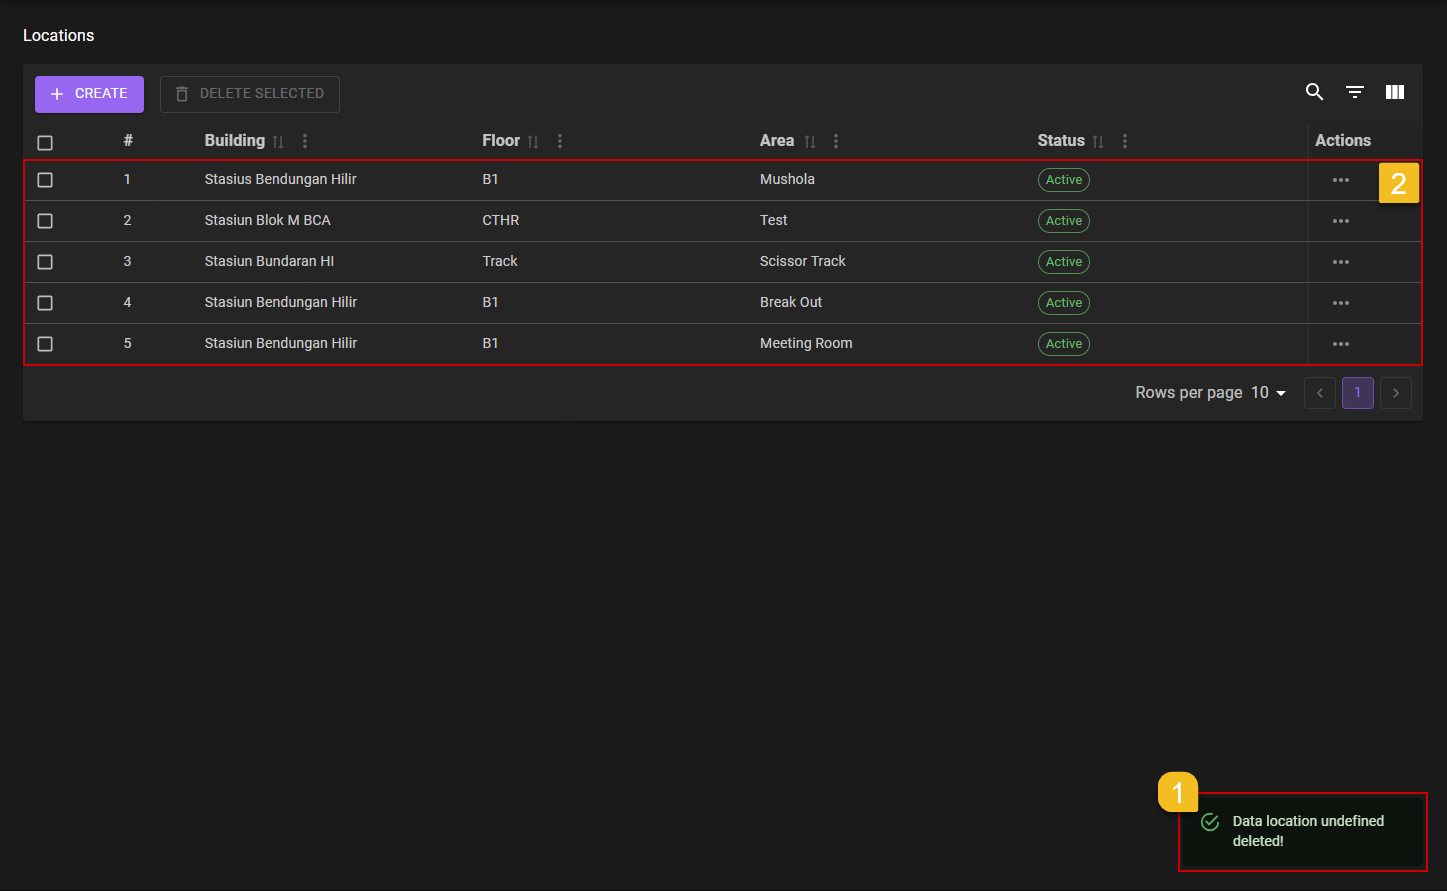
- Super Admin will got a notification
Data Location [numbmer] deleted!. - Super Admin can check on the list, if the deleted part are still on the list or not.